When I started this project I thought that it was going to be a really quick build, paint it all blue, have the wings folded up, and add that cool little tractor. The last thing I wanted was another long project, but that's exactly what I've got myself into. The only difference between this project and my last one is that I'm still having a lot of fun with this kit. And this week I'm going to try something new that I tried once before when I built the Tamiya 1:48 F-14D. I played around with oil paints, but I never really got the results I wanted for a dirty and used surface.
This time I'm going to try the effect again, and I think I'll be a lot happier with the end result.
I started by painting the landing gear and wheel hubs with Tamiya LP-72 Mica Silver. I then painted the springs and brake line with XF-1 Flat Black.
Next, I painted Tamiya Panel Line Accent Color -Black- to highlight the details on the silver parts. This will really help all of those details stand out that are usually reflected by the silver paint.
I painted the tires using Vallejo Black-Grey (70.862). I really like to use this color for tires as it's not as jarring as using something like Flat Black. The Black Grey has a more used look and compliments the rest of the model.
To add some more weathering to the model I brushed Tamiya Panel Line Accent Color -Grey- onto the tire and I had a lot of fun watching it pool around all of the treading that I had created earlier. Now it really looks the part. Once the wash had dried I cleaned off the excess with Tamiya Enamel Thinner.
Here is the completed landing gear ready to be glued to the wheel bay. I gave the entire part a flat coat, and I'm really thrilled with how the tire treads look with that wash. Also, those springs that caused me a lot of grief at times really add a nice level of detail I've been trying to achieve with this model.
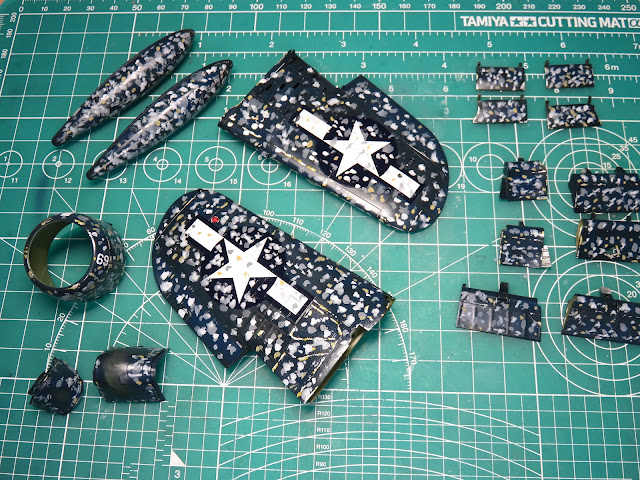
Aside from the fact that my Corsair looks as if I angered every bird in the Pacific, there was a method behind my madness.
I used the following Tamiya Enamel paints: XF-2 Flat White, XF-19 Sky Grey, XF-60 Dark Yellow, and XF-66 Light Grey. I thinned each of these paints with Tamiya Enamel Thinner so that the paint wouldn't be too thick for the next step.
I've tried using the dot filter method in the past and I've had limited results with it. I've found that Tamiya Enamels are really easy for me to control and generally get the look that I had in mind. It's important to let the enamels dry thoroughly for this to work properly. Adding enamel thinner does help speed up the drying time a bit.
I dotted every part that wasn't going to be interior green. At the moment it all looks like a hopeless mess, but soon it will all come together.
I should also mention that this is done over a gloss coat. You can do this on a flat coat but it's a little trickier, as the paint bites into the flat coat more and makes it a lot more challenging to remove and distort the paint.
I hunted for the right brush for this process at an art supplies store, but I couldn't find anything that was just the right shape. Later on, I happened to be walking near a cosmetics department and I saw these blush brushes, and it looked close to what I had imagined. This particular brush will lose the odd hair, but it works incredibly well for this process.
First I'll wet the paint down, by gently brushing on some enamel thinner. You really don't need to apply a lot here, just enough so that the paint will be reactivated. Next, I take the brush and stipple the surface of the paint creating a nice muddy pattern.
As
I go along I dab the brush into a paper towel to remove
the excess paint.
Here you can see much closer how all of the colors will blend together and create a uniform layer of grime from all of the flying this Corsair has done. You can still also see all of the colors in the different shades of blue that were previously painted.
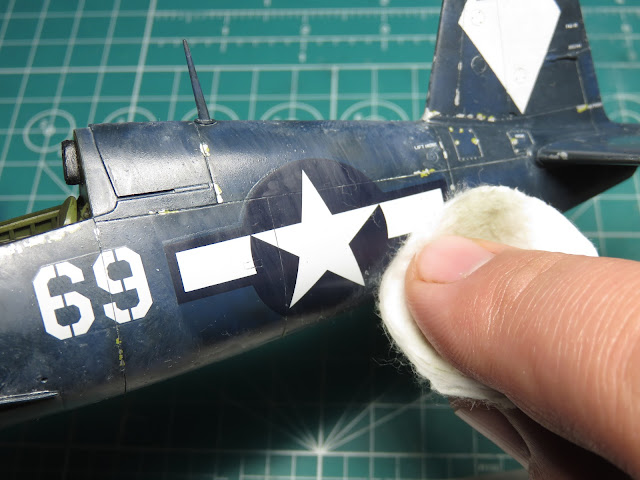
There were a few places where there was just too much paint and I wanted to remove some of the excess. I use these cotton pads which are really inexpensive and they last quite a while. After I've removed the paint I'll use the brush to once again dab the surface just as before.
And this is the end result. It's a bit hard to make it all out because of the gloss coating reflecting the colors. You might notice that there are a lot of hairs from the cotton pads that I used. These are stuck into the wet paint and are difficult to remove. However, I've found that once the paint is completely dry they are easy to remove simply by brushing over the model using a thick brush.
For a flat coat, I used Mr. Color Aqueous Flat Clear (H-20). The flat was thinned about 40% with Mr. Levelling Thinner and lightly sprayed onto the model to seal everything together. I then left the model to dry for about 24 hours to allow the flat to harden up properly for me to handle for the final assembly.
On all of the Zinc Chromate Green sections I painted on Tamiya Panel Line Accent Color -Dark Brown-. I was really excited to add it to the cowl flaps that I built earlier as the wash really showed off the springs and other details that I built. This is going to look really cool in a moment when it's finally added to the model.
I've now glued the cowling around the engine. I really like the effect that the chipped paint has with the XF-4 Yellow Green and now that the flat coat is added the AS-12 Bare Metal Silver is toned down and really compliments the rest of the colors.
It is unfortunate that once the propeller is added a lot of that engine detail will be hidden, but for the moment I'm enjoying looking at all of the different details.
I also added the Dark Brown wash into the gear bays, and it really helped all of the wires pop and stand out. I've also glued on the pylons that will hold onto the drop tanks. I'll be adding these to the model after the landing flaps are put in place.
I used Mr. Hobby, Mr. Just super glue to attach the landing gear to the bays. Tamiya designed these parts to fit in place really securely so the installation was easy. I can't really say the same for the gear doors. I had a harder time getting these to fit, so again I used Mr. Just and this made the installation a lot easier.
I wasn't too thrilled with the gunsight screen that came with the Tamiya kit. It's sort of accurate in its own way, but I thought I'd try making a new one from some clear plastic. I cut some thin strips of styrene that would act as the bracers. I painted these with XF-1 Flat Black and then glued them to the inside of the canopy frame using Tamiya Multipurpose Cement Clear.
Once the frames were dry I then glued the clear sheet. This however was a new challenge, as I added the gunsight to the instrument panel the gunsight was too big and the new screen I built was also too big. So I had to start over and shorten this section as well as lower the gunsight quite a bit to make it more accurate.
Eventually, I managed to get everything to fit in place and I was able to glue the forward canopy to the fuselage.
With the forward section of the canopy added I could build the pilot that came with the Moto-Tug section of the kit. The pilot figure was pretty easy to build up and I really like the pose. The right arm will rest slightly hanging over the side of the cockpit, while the left arm will rest on the canopy. This arm was a bit more difficult to get the pose correct, but with some patience, I eventually got it in the right position.
Now this is exciting, I can firmly state that I'm nearly done with this model. There's not much left to do now except paint a few smaller parts and then I can add on the landing flaps and the wings.
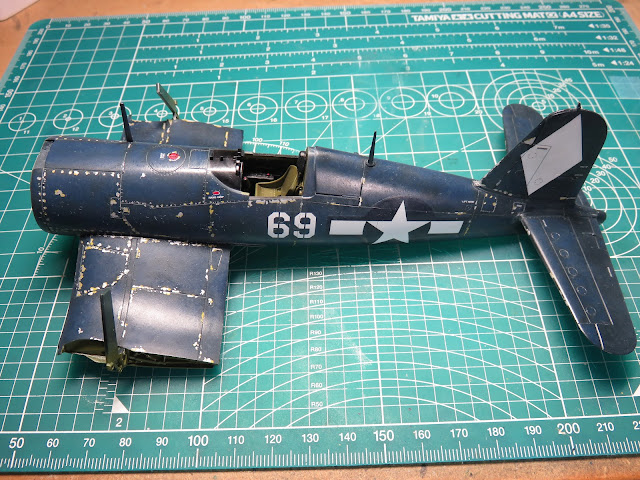
It's been a fun week to see all of these parts coming together, and I'm a lot happier with my painting choices now that the flat coat has blended all of the colors together. Also, that oil filter really added just the right amount of grime and use I had wanted.
Now I just have to be careful, as when I get this close to having the model completed I get over anxious and rush, and that just leads to creating mistakes. Until next time!
To be concluded...


No comments:
Post a Comment