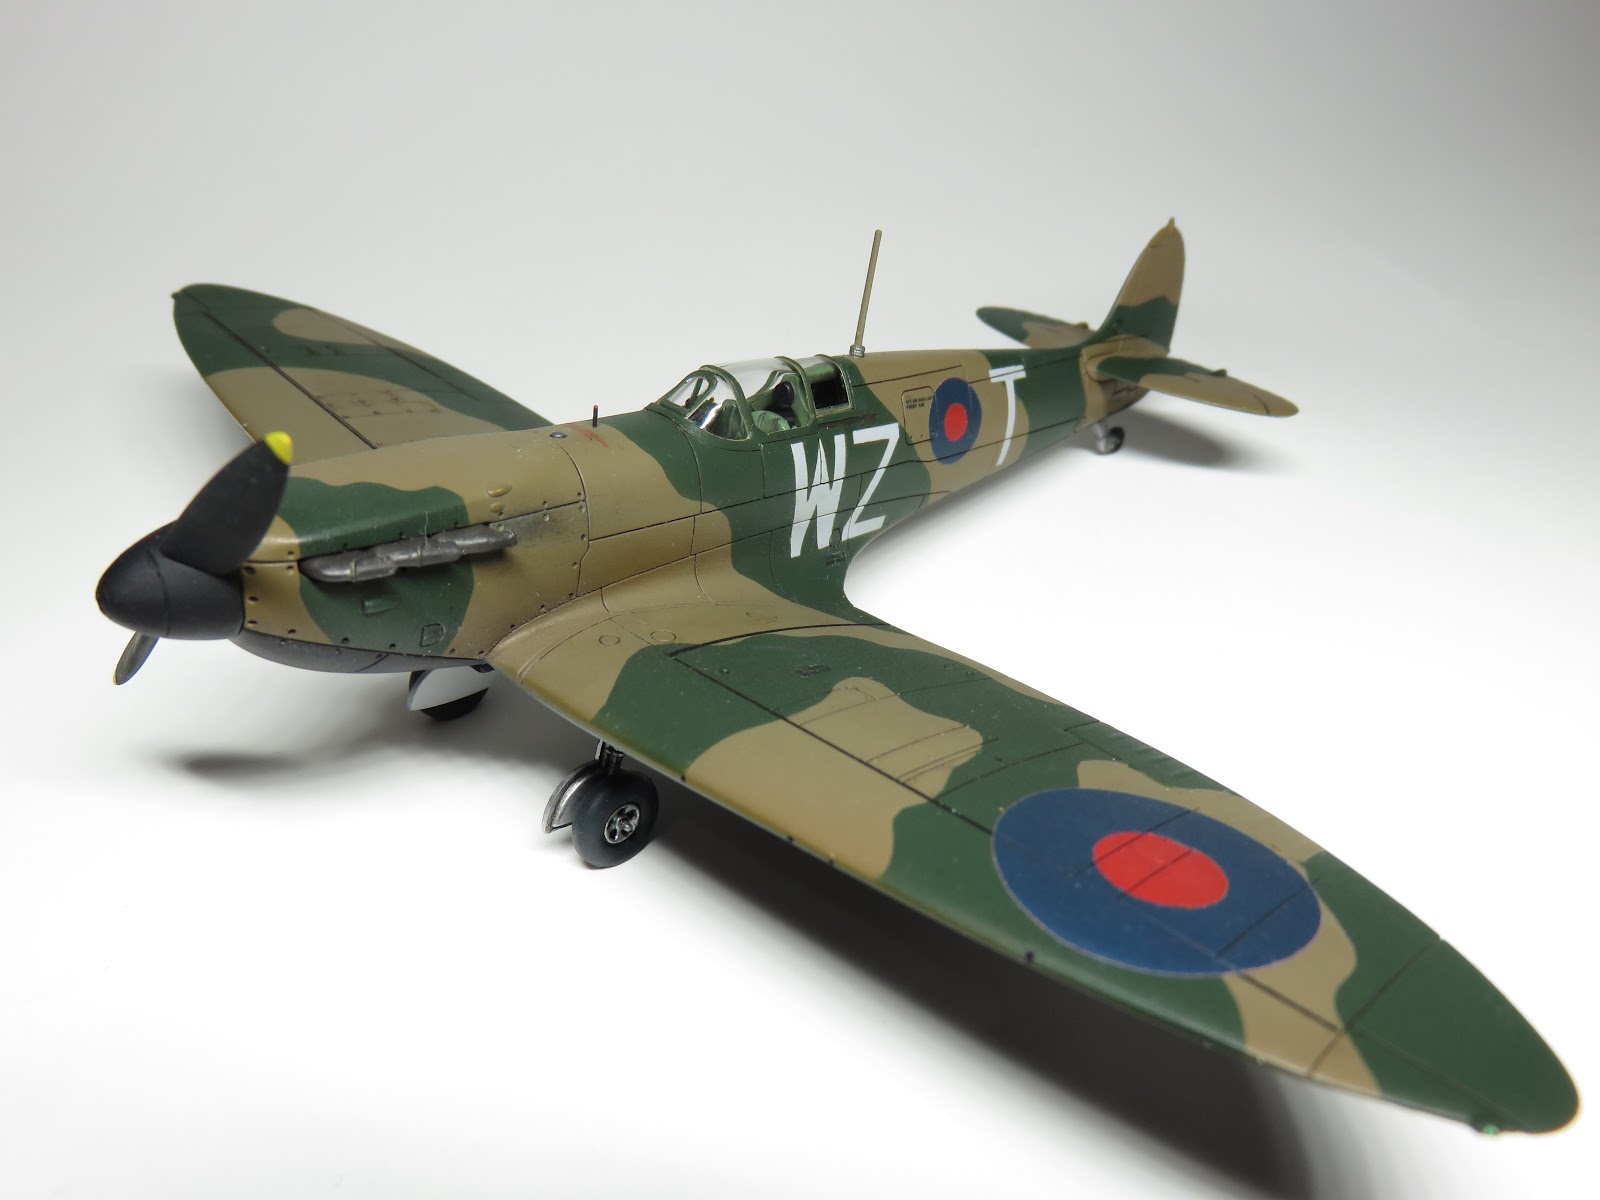
The Spitfire needs little to no introduction. However this one might. This is an early variant of the Spitfire from 1938. With a twin bladed prop, straight backed canopy, and a longer antenna. Other than that it's a standard Mk.I.
This was supposed to be a simple project, but as I studied the instructions planning how I would proceed with the build I kept getting new ideas. I began to wonder if I could paint on the call Letters on the fuselage, the black walk band on the wings, and the roundels. And one by one, I began to find solutions to achieve these goals. So why not try?
This is the new sprue Airfix added to the kit. It's also got new parts to build a Mk.II.
(Yes I'm going to build that one too)
On the Left features the new Straight back Canopy,
While the Right has the standard kit version.
Quite a detailed cockpit
Interior parts were painted with Tamiya XF-71 Cockpit Green.
Then given a enamel wash with black paint.
I found quite a large gap on the underside of the wings.
This was filled in with Citadel Liquid Green Stuff.
The gun ports were disappointing since they didn't
quite match, and made oval rather than round shapes.
I filled in the holes with some styrene rods. These were then
sanded down, and filled in with more Liquid Green Stuff.
Later on I would drill them out again with my Pin Vice.
Surprisingly the canopy was easier to mask than I originally
thought. This of course took some time, but it turned out
really well.
Primed with Mr. Surfacer 1200.
Underside painted Tamiya XF-1 Flat Black,
and XF-2 Flat White, and glossed over.
I first painted the upper surface brown using Revell Aqua 82 Dark Earth. I had a few practice runs

with the Revell Aqua colors, and they all went well. Until I started painting my Spitfire. I sprayed on so many layer to get a good coat, and it still bled through to the Grey Primer. And worst of all it sandpapered on me, really badly! So I decided to try mixing my own version of Dark Earth with Tamiya acrylics.
Tamiya has their own mix for Dark Earth with their Spitfire Mk.I kits. But I find this to be way to much of a Red Brown, than a Dark Earth. So I used:
XF-72 Brown (JGSDF) - 1 Part
+
XF-49 Khaki - 2 Parts
I really like this mix. The color is pretty close to what I was imagining, and I'll use this on future RAF projects. (Bristol Blenheim in the near future...)
A lot of work was involved masking this Spitfire properly. Taking as much care as I could to press the tape to the surface. I'm very happy with the final result of this.
And here is the result. I had a slight bit of over spray on one spot. And not really noticeable enough to warrant any touch ups. And now about the custom RAF Green. Now Tamiya makes their own RAF Dark Green (XF-81). But I found this to be too olive for this build. So again I mixed my own.
XF-26 Deep Green - 3 Parts
+
XF-27 Black Green - 4 Parts
I like the green that I mixed but it wasn't 100% the shade I was aiming for. I'll try this again in future builds. But like I said I'm very satisfied with how this is all turning out.
I was really nervous about removing the masks for the call letters on the fuselage. And I did have a bit of bleed through, but that was from all the layering of the Revell Aqua Dark Earth. Still there they are painted on and they look pretty good.
XF-1 Flat black was pained on the wings to indicate the walkway lines.
I couldn't find an explanation for the underside of the control surfaces being silver, but they are. I used Vallejo Metal Color Acrylics. I really love these as they are easy to airbrush, and don't have much flake to them. I mixed Aluminum, and added a few drops of Duraluminum to darken it up.
At this point I was tossing the idea of just using the kit supplied decals versus painting them on. And once I was more confident in my method, I preceded with my plan. After creating circular templates, I painted a base coat of XF-2 Flat white. This would help eliminate the Brown/Green underneath, and allow a bright base for the Red and Blue to lay on.
I tried mixing my own darker red, but every time it came out more brown. These roundels needed to be a bright red, but not as bright as XF-7 Flat Red. So I first painted XF-9 Hull Red, and then began lightly layering the XF-7. With this I was able to produce the red I color I had envisioned.
I masked off the center Red and repainted the roundel white. For the blue I mixed XF-8 Flat Blue, and XF-17 Sea Blue, in a 50-50 mix. Again lightly painting these colors on to try and avoid build up.
I carefully removed the masks and I was really pleased with the end result. granted these aren't perfect, there's a bit of bleed through on them. They still look better than I had imagined. And this is certainly something I'm going to do more of in the future, especially since I know what to do better.
This kit has deep, deep panel lines. And I couldn't quite get the paint in all the corners of the panels. So I opted to paint the panel lines in. The kit actually didn't need them painted in, oddly enough they stand out on their own. I used Testors Enamel Light Grey for the underside black. And Testors Rubber for the rest of the model. The excess was later cleaned with Mineral Spirits.
I've seen this with a lot of Spitfire kits and I'm not sure why they do this, but the fuel cap was recessed. And left a rather large seam line in the center. Not the fuel cap is nearly flush with the top of the cowling. And typically not painted the same color as the fuselage. I cut a thin rod of styrene, and painted it XF-56 Metallic Grey. And placed it in the hole.
Time to assemble the kit.
Here the Fuel cap is in place. And while browsing through a Spitfire book I own studying cockpit detail. I came across a picture of and early Spitfire, with the same style canopy that came with the kit. this Spitfire did not have a gyroscopic gunsight. But rather something that mimicked gunsights of WWI aircraft. A circular sight in the canopy, and a peg in the fuselage. Here I've drilled out the hole for the sight peg.
Here I've place a thin wire rod into the hole. Also not I cut off the glass portion of the gunsight in the cockpit, and drilled a hole for the circular gunsight that would be added from a spare etched part.
Now to paint it flat black and a dab on top of bright red, from Formula P3 paints.
Even thought I didn't use the bigger kit decals, I did use all the kit supplied stencils. Printed by Cartograf, you can easily make out the tiny writing.
I remember how excited I was to discover Future floor polish. I at long last had an effective gloss coat to help seal in my decals and protect them as well create a barrier to pain on panel lines. But adding a Flat Coat is a different story. I used Tamiya XF-86 Flat Clear for many years. But over time, its become more difficult to use.
Some have reported that it will not flatten a gloss coat, and as I've experienced it has left a grey/frosty effect on the model. Then my brother came and asked me if I thought The Army Painter - Anti Shine Matt Varnish could be airbrushed?
I don't really like to try thinning paints with other brand thinners. Sometimes they just don't mix, they can become sandy, or gunky, or just not mix at all. Vallejo pride themselves on being a "pure" acrylic, so I thought their thinner might work better than Tamiya. And you know what? It did!
We tested this on a separate sample and the results were better than I ever imagined. It went down flat, and there was no greyish frosting effect. In fact the colors looked almost identical to the original paint. Basically doing exactly what I wanted to begin with. Yeah, as mush as I love Tamiya acrylics, I'm never going back to their flat clear.
Mix this in about a 3-1 ratio. 3 parts Flat Base to 1 part Thinner. And test around until you find the appropriate mix. You might just find a 4-1 ratio is more to your liking.
Just a side note, I originally painted on a layer of Tamiya XF-86. And then applied the Army Painter Flat over top. So my colors didn't come out as nice as on the test subjects.
This was very difficult to focus on but the tiny etched gunsight has been added to the cockpit. I left it in it's original brass color for this picture, but it would later be painted flat black.
So here it is, my completed 1938 Spitfire. I really do love this kit, Airfix made this a very simple yet fun kit. Easy and the perfect start for any beginner, yet there's more than enough to satisfy an ambitious builder. This is a harder kit to find since Airfix has stopped it's production, which is a disappointment. As this is an odd variant of the Spitfire, I do hope it will make a return to hobby store shelves one day.
I like my attempts to paint on the Roundels and call signs. They didn't turn out as nice as I imagined, but the process was worth the time. I learned a lot and I'm not to nervous about trying this again. In fact I much prefer this painted on look. My only regret is that I should have used a bigger subject, like a 1:48th scale Spitfire.
Still this kit is going to sit happily on my Spitfire shelf. I'm eager to buy another one so I can use the extra parts and build that Mk.II. Thanks for reading.


 with the Revell Aqua colors, and they all went well. Until I started painting my Spitfire. I sprayed on so many layer to get a good coat, and it still bled through to the Grey Primer. And worst of all it sandpapered on me, really badly! So I decided to try mixing my own version of Dark Earth with Tamiya acrylics.