I got this turret as compensation for building the Bandai 1:72 A-wing for my brother. This Death Star Turret comes with the A-wing kit as an added bonus. It's 1:144th scale, and is a really nice addition for have. Personally I wish that I had a few more of these, it's a really great kit and adds a bit more to the scene.
This is a really simple kit, not much to it. And everything is on one sprue. The Laser Guns will hold the colored blaster beams, but this isn't mentioned in the instructions. On a side note these should be Green as they are Imperial.
I used Army Painter "Brush on Primer" This provided great coverage, and helped add some of the different shades of grey I needed for the panels.
Next was to add different Grey's to random panels. I began with Tamiya XF-24 Dark Grey
I wanted to add a bit of color to they grey structure to help it be less drab. I used XF-68 Nato Brown, and XF-84 Dark Iron. I tried to keep these colors very random and limited. As too much and it quickly becomes distracting.
Masking was very easy. I placed Tamiya tape on the surface, and then traced around the panel. Taking a sharp hobby knife I easily cut around each panel.
The overall color was Vallejo Mecha Color White Grey (69.002) These are airbrush ready paints. And if you need a basic white grey sci-fi color this is a good one to have in a hurry.
Tamiya XF-77 IJN Grey, was lightly painted on the tips of the barrels to simulate burnt areas.
With the maskings removed and painting completed I was now able to begin weathering this model. First I would add a few layer of Future. This will help protect the existing paint, and make weathering much easier.
I used various artist oils and cleaned them with Mineral Spirits. I wanted to create some streaking effects going down the turret. I dabbed a bit of Burnt Umber on the underside of some of the raised squares. And with a damp brush, I pulled the pant downwards. I also applied random streaks of black in the middle sections just to help dirty things more.
One thing I did not expect, on the few squares that I left as the primer, once the Mineral Spirits were added the primer was instantly removed. This did not affect any of the other acrylics, only the primer. I was really surprised by this effect, so I'll pay attention to this in the future.
I really enjoyed this mini kit, if I can call it that. This is a simple and sweet kit, and I had a lot of fun adding a few extra details to it. The details on it are great and I love seeing this next to my 1:144 X-wing.
I remember opening this kit and thinking "there is no way I can airbrush this". So I put it back in the box and shelved it. Earlier this year (2017) My brother built the Bandai 1:72 Tie Interceptor, and hand brushed all of it. I was so impressed that I commissioned him to paint my X-wing.
Sadly he ran into too many issues with the kit and gave it back to me. So I took the painted parts, and soaked them in oven cleaner, and brushed off the older paint. And this X-wing was back in action.
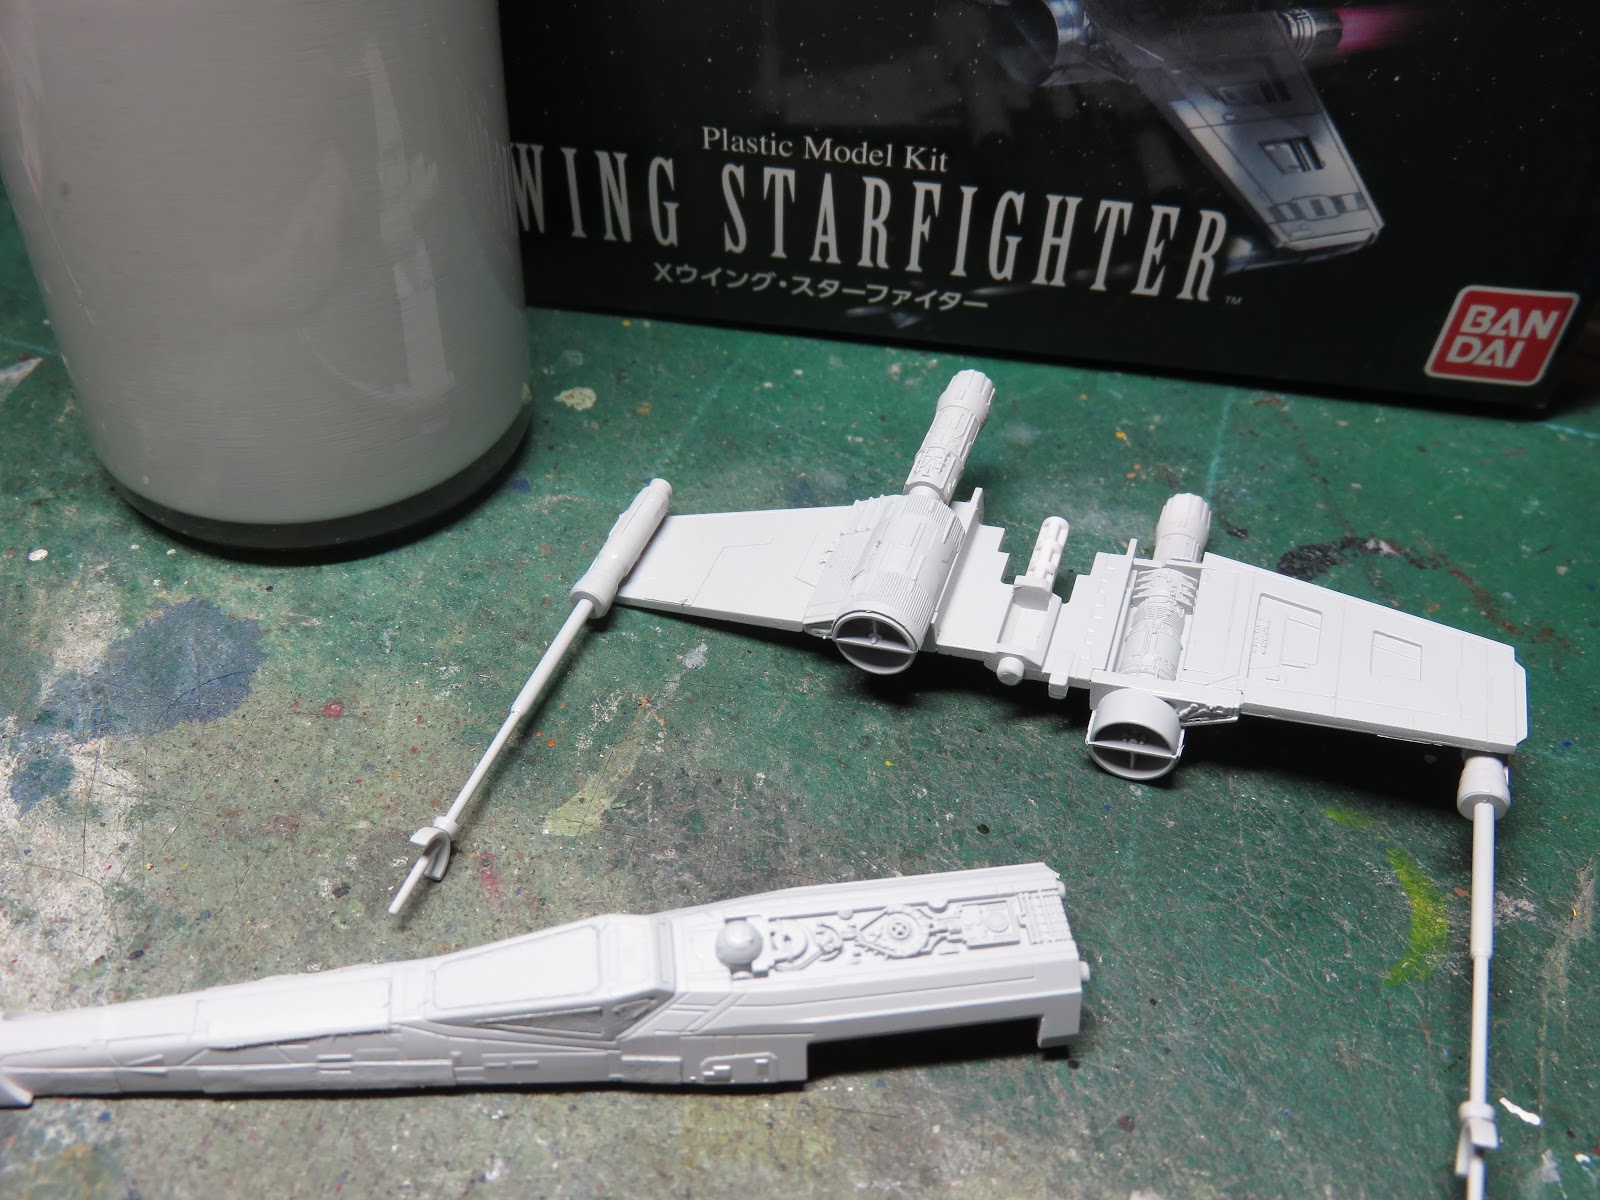
Now as great as these smaller Bandai kits are, their only fault in my books is that they only come with stickers and no decals. So unless I wanted to make my own decals (which I didn't), I'd have to paint this myself.
I began by priming the model with Mr Hobby, Mr. Surfacer 1200. This is to help the paint stick to the model but also protect the plastic from an Enamel wash I'd be applying later on. For those of you unaware, Enamel paints tend to eat at Bandai styrene. Causing them to become very brittle, very quickly.
First color I added was the new Vellejo Mecha color Red 69.008
Next I took some Tamiya tape and laid it out on a sheet of glass. I put the kit supplied Red sticker on top and traced around it. Then carefully peeling the sticker off my masking. And laying the masking in place.
Just to note a small mistake on the Bandai guide, There is no Red Patch where sticker #8 is supposed to go. This should be left a dark grey color. Don't use sticker #8, unless of course you really want to, it's your build after all.
I traced these "L" brackets from the stickers. This made the work go a lot easier especially with the small scale.
I originally added the 5 Red bars, but found that I was moving them around while I was handling the model. Later I came up with a better method for masking these.
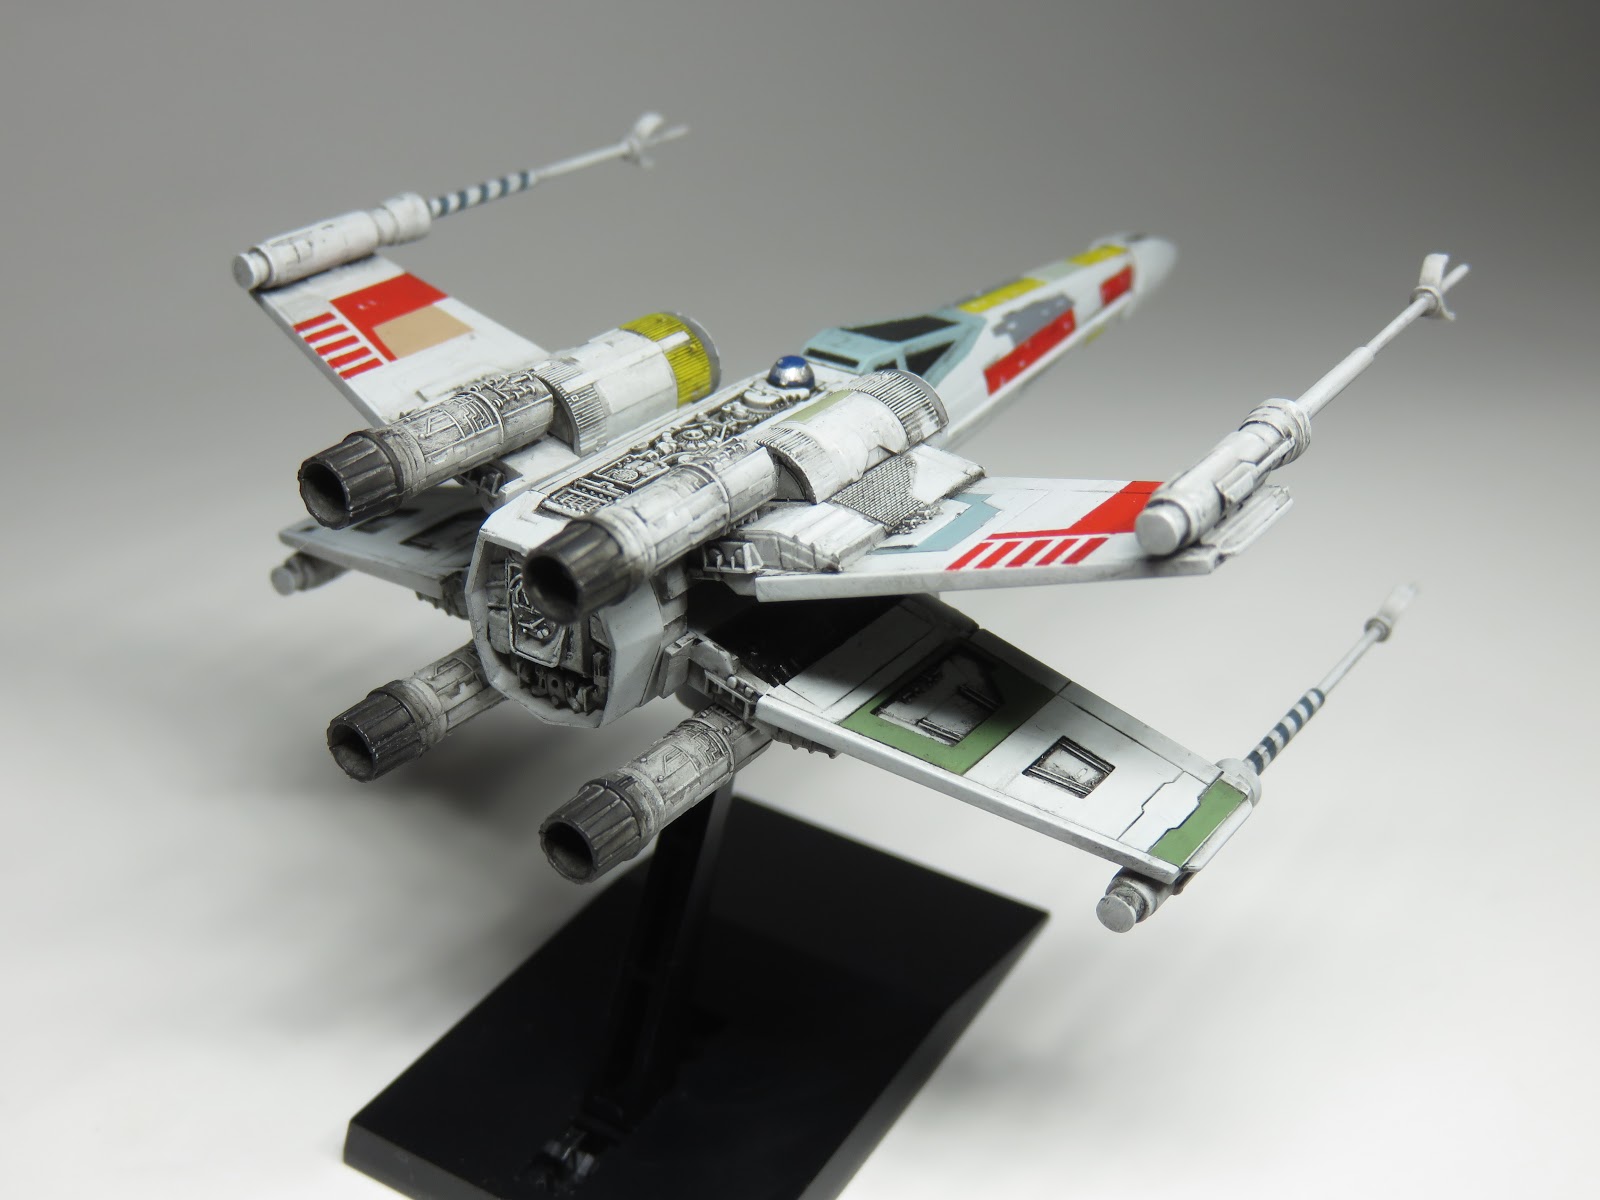
This began the long, and admittedly fun project of painting and masking various panels. I used a mix of studio references of the original Red 5 X-wing, and the Fine Molds and Bandai 1:72 X-wing kits.
Tamiya XF-69 Nato Black
XF-23 Sky Blue
Vallejo Mecha Color - Yellow 69.004
(Top Panels on Left Engine) XF-76 Grey Green (IJN)
(Around the Engine Intakes) XF-75 IJN Grey (Kure Arsenal)
XF-18 Medium Blue
(Left Panel) XF-63 German Grey
(Right Panel) XF-75 IJN Grey (Kure Arsenal)
XF-63 German Grey
XF-1 Flat Black, with XF-69 Nato Black lightly misted on top.
For the overall "Light Grey" color, I used a custom mix. I have a large paint jar that I mixed 1 bottle of Tamiya XF-83 Medium Sea Grey 2 (RAF), and 7 or 9 bottles of XF-2 Flat White. This grey was intended for a large project that I've since shelved, but makes and excellent X-wing Grey as far as I'm concerned.
With the exception of the windows, all the maskings have now been removed.
XF-23 Light Blue for the window frames.
I tried painting the burnt effect of the engines, by painting XF-1 Flat Black, and then a layer of XF-10 Flat Brown. I wasn't happy with the end result. Only after they were painted did I find the color I should have used but forgot about XF-84 Dark Iron. I'll remember this for my next X-wing build.
I now dry brushed a bit of silver to highlight the details.
So this was my "easier" method. I took some Tamiya tape and masked the area. Then I cut some very thin strips, and was able to "pull" these into straight lines. Using a compass tool, I was able to keep and adequate distance between the bars.
A little Silly Putty was placed around to prevent any over spray.
Had a little bit of and accident here where a bit of the thinner didn't mix as thoroughly as I wanted, and it spurted out under the tape. I rubbed off as much of the red as I could with a cocktail stick, and then repainted the light grey.
I can't remember the colors I used to paint R2-D2, more so I was glad that I was able to.
For the wash I used Tamiya Panel Line Accent Color - Black. This went on too thick in hindsight, but after it dried for a few hours I cleaned it using a brush dipped in Mineral Spirits. Now this was the step I needed to take the most care on since I was using an Enamel Wash, and wanted to minimize the risk of damaging the plastic.
This was one of my favourite parts of the build. I used Tamiya Weathering Set B "Soot" to paint on the burnt effects on the exhausts. I was thrilled with how this turned out.
Now that everything was weathered and given a flat base (Army Painter -Matt Varnish Effect) It was ready to be assembled.
As weird as this may sound, this kit was the funnest project I've built all year. This little kit really got me motivated to build again. And for that this kit is invaluable to me. Aside from the Red leaking through the tape, it was a really relaxing build.
I've got 2 more Star Wars Bandai kit on the go as a result, and I've ordered another 1:144 X-wing so I can build it with Blue Leader markings. And I'm excited all over again to mask off all those tiny details.
Also check out my full build up video of this X-wing bellow, and thanks for reading.