Monday, February 26, 2024

MPC 1:72 Millennium Falcon / Stellar Envoy (Part 4)

 Work progressed slower this past week as I had run into a few issues that needed to be taken care of. I noticed and as you will see later that there are some warping issues with the model. When I was assembling the upper and lower hulls I ran into some fit issues. Now, I don't know if these were the results of the hull sections cooling too fast after they were injected at the factory. Or if the warping was caused by the parts moving around in transit, or, if it was my fault for test fitting the parts so often. 

Either way, this caused me to work slowly so that I could properly align the sections and avoid unnecessary gaps, and extra cleanup. 


Last time I added the new inner sections to the front mandibles. I've temporarily placed the hull sections together so that I can glue the newly tooled side walls to the lower section of the hull.

You can see on the lower section of the hull that there are small location tabs that will help with the alignment of this part. 


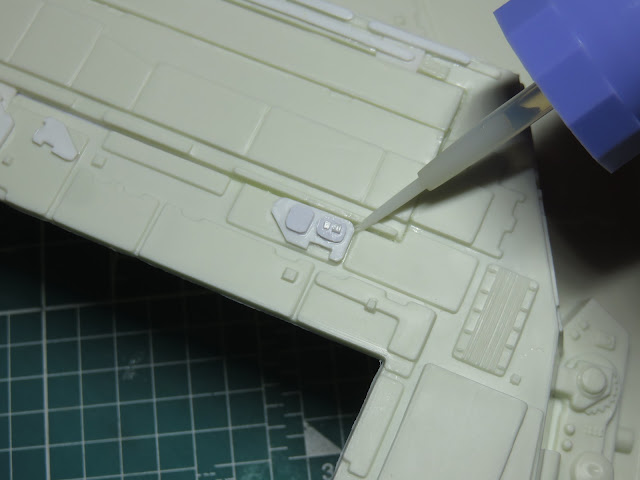
With the sidewall added I flipped the model over and added a good amount of Mr. Cement SP into the open grove. Once I had the length of the part glued I pressed it into place, ensuring a sturdy fit and that the angle of the part is correct.


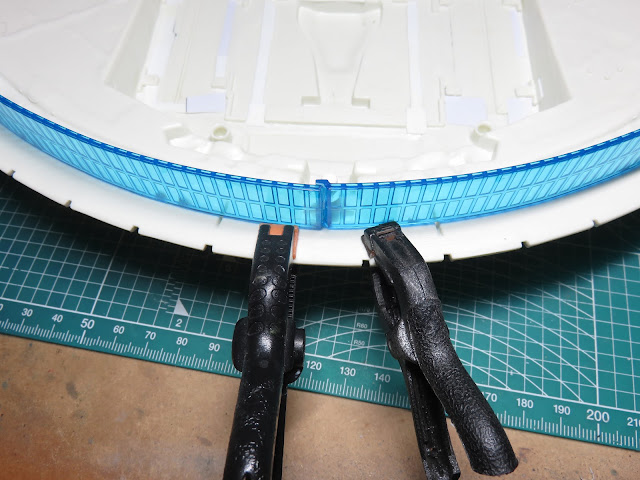
When I glued in the new back engine sections I used 2 clamps to keep the parts in place while they dried. I again used Mr. Cement SP to glue these sections as this glue allows me to work quicker.

Mr. Cement SP (Special Power) is designed as a fast-acting cement. It melts the styrene together quicker and dries quicker so that you can get a lot more work done. As a result, this glue is quite aggressive, and with enough glue added, I can push the parts together to really fuse the plastic. This glue works particularly well with Tamiya, Eduard, Airfix, and MPC styrene.   


As I had mentioned in a previous post I wasn't too excited by the new blue engine sections. I have no doubt that these new parts will look great if you are lighting the model, but it's a bit more difficult if you want this to be a more static model. 

I thought about building a grill section, but instead, I thought that I'd paint some lit engine detail. I started with this long strip of styrene that would be glued to the back of the clear blue.

On the original studio model of the Millennium Falcon, the engines were just a bright white light. Later on with the new Star Wars Special Editions, new scenes of the Falcon were added which slightly changed the all white light to slightly blue. 


I started sanding the styrene with 600 grit sanding sponge, which would help the primer grip to the styrene better. I then primed the styrene with Tamiya Liquid Surface Primer G. I then painted my first layer of Tamiya XF-23 Sky Blue over the entire strip. 


Next, I added some Mr. Hobby Aqueous H-11 Flat White to the X-23 Sky Blue to lighten up the paint a lot, and this was then painted into the center section. 


More Flat White was painted on the inner section to create a brighter light for the engine effect.


I really like this effect, but I wanted the blue to be a bit bolder. So I took some Tamiya X-23 Clear Blue and I slowly and carefully painted this to the edges of the styrene. This looks a lot nicer than before.


Lastly, I sealed the paint in with some Mr. Hobby Aqueous H-110 Semi-Gloss Clear. I had a lot of fun painting this engine effect, and I think it's going to look pretty good when it's fitted onto the model.


I glued the engine effect with Mr. Just Super Glue. Now that it's installed I can tape over this section so that I don't get paint and primer on it. Again, I'm just really pleased with how nice this looks. One day I'll learn how to use LED's and maybe then I can create this same effect but with real light, but for now this will do nicely.


I toyed with the idea of gluing down all of the side walls to the lower hull section and leaving the upper hull separate until the model was completed. This would make it easier to paint, weather, and detail. But because of the design of this model, I ultimately decided that it would be better to glue everything together.

Before I glued the hull sections together I painted the inner front section of the mandibles. Once the hull sections are added these parts would be nearly impossible to reach with my airbrush. I primed the area once again with Tamiya Liquid Surface Primer and then painted on the main hull color Mr. Color 316 White FS17875 (Insignia White).

This color was painted with 2 thin layers, and it's a gloss paint and this will make things easier when I add a wash to the model later on.


On the port side of the model at the section where the docking ring is going to be placed, I ran into a fit issue. When I connected the pin to the upper and lower sections the area was too tall, and this prevented me from connecting the side walls to the upper hull. 

I thought that this might be warping as I mentioned earlier, so I decided that the easiest thing to do was to remove the pin from both sections of the hulls. This was easy to do as most of the model had already been glued together and I wasn't going to lose any alignment with this part missing. 

This might have been a one time error with my particular model, or this could have been caused by me somewhere during the assembly process, but if it happens to you just know that it's an easy fix.


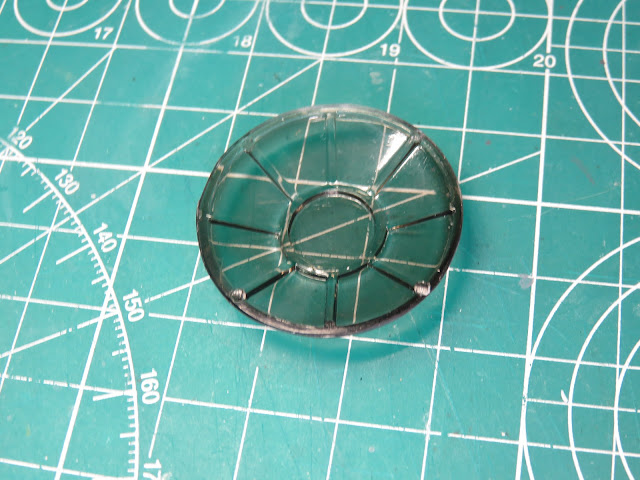
I was also cleaning the canopy section of flash when I noticed that 2 of the frames on either side were missing. I imagine that when MPC was designing this kit back in the 70s it was easier to leave these bars off of the model when they were injecting the plastic into the molds. 

This was a simple fix. I cut some thin strips of styrene roughly the same width as the preexisting frames and carefully glued these in place. I then added a generous amount of Mr. Dissolved Putty to the new frames to seal in any gaps. Lastly, the putty was sanded flush with the rest of the plastic. 


Here the upper hull is glued to the Stellar Envoy, and the side docking rings have also been added.

It's really coming together now. I thought that at this stage I'd have some primer added, but this kit took a bit longer to put together than I initially had thought. It's looking good at this stage, and the new lower side walls that Round 2 built for this kit look fantastic!

There are still some smaller assemblies to add to this model before I can begin priming. The most obvious being the lower section of the cockpit tunnel and the new tooled radar dish. But that will have to wait for next week.


To be continued...


Tuesday, February 13, 2024

MPC 1:72 Millennium Falcon / Stellar Envoy (Part 3)

 Work was a bit slower than I had expected this week, I keep forgetting that this is an older kit without a lot of the modern conveniences we have today. Again most of my time was consumed with sanding the excess plastic on the parts, that being said this continues to be a fun kit to build and I'm closer now to having it all assembled so that I can finally get a coat of primer on this model.


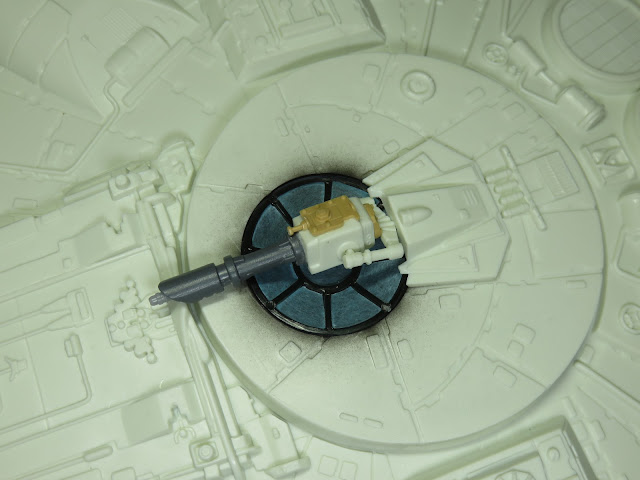
I wanted to try and limit what you could see through the gunner positions. There isn't a lot of detail to these sections and you can see all the way through the inside. I decided that I'd spray a few coats of Tamiya X-19 Smoke on the inside of the turret window.  This worked to an extent, but it's still not as dark as I'd like it to be. 


I painted the inside of the turret section with Mr. Hobby Aqueous H-12 Flat Black to further help hide the details when you look down the turret window. You will notice the 3 little pegs on this side of the part. These are connected to pins that would allow the turret to rotate freely around the model. This is a fun playable feature of the model, but I'm going to glue this directly to the hull section. 


Just like I did with the cockpit, I've painted the seat with Tamiya XF-60 Dark Yellow, and XF-53 Neutral Grey for the platform. These gunner seats have small controls on the end of the chair arms, I painted these silver. 

These seats are in no way accurate to the Millennium Falcon, but I really love the look of these parts, and I think they are perfect for the Stellar Envoy!


In the words of the internet, "an attempt was made". That's really all I can say to describe the Quad Laser Canons. Sadly this looks more like an egg beater than a defensive weapon, so why not try and build something that will be unique to the Stellar Envoy.


I glued the 2 halves of the canon together. After the glue had dried I took my Tamiya Sprue Cutters, I snipped off the cannon barrels, and then sanded down the side edges. 


I rummaged through my spare parts box looking for anything I could use to create a gun barrel, which was more difficult because I needed 2 for the top and bottom. I wasn't having much luck when I remembered that my brother has a lot of Warhammer 40,000 models and that he might have something I could use.

And did he ever, he had so many parts that I honestly had a hard time choosing. But we both had a really fun time looking at the parts and inventing different guns. In the end, I chose this barrel, as I really liked the angled edge to the front and thought this would look the most dramatic on the completed model.


I found these panels in my spares, they are from the Tamiya 1:35 Male Mk IV tank. I really liked the bolt details on these parts, and I thought it added some nice detail to the bulk of the turret. 


Lastly, I found some canon barrels from a Bandai 1:72 Tie Fighter, and I thought these looked great inserted into the end of the barrel. For now, I think that these canons are done, but I might later on add some extra details. This was really fun getting to scratch build these turrets.


And here is a test fit of the new canon added to the turret. I think it looks pretty good right now, and it's going to look a lot better once it's painted up.


Here are some of the exposed opened sections of the kit. I had wondered if I should glue these to the model now, or paint and weather them, then glue them to the model. But I think it will be easier for me to glue them all to the model rather than deal with cleaning up paint on the edges. Also, there is quite a bit on these edges that needs to be cleaned and sanded to ensure a proper and tight fit with the inside of the hull section.


I love that MPC added numbers on the back of the parts and on the hull where they are supposed to be glued. This saves a lot of confusion, however, as you might notice there are a lot of bumpy areas to the inside of the hull. This didn't help when I was gluing these sections in place as it left slight gaps.

 I used Mr. Cement SP to glue these parts in place, and the aggressive nature of the SP made it easier to fuse the plastic together. I had to work slowly to glue these in one by one, but because of the SP, they are really secured to the hull.


This was really cool, all of the wires that I sanded and thinned down earlier connected with rods inside the openings. This is a fun detail, and should the modeler desire, you could even go one step further and add in more detail using wire or styrene rod.


Probably my favorite part of the exposed details on the Falcon is this, the hull from a Jagdpanther. It's one of those details that once I saw it I could never unsee it. MPC even molded in the small circular section that's the machine gun turret on the lower left side. 


With all of the opened parts now glued in place, I decided I would glue the side wall details to the lower hull section. As I mentioned before the inside of the hull is bumpy so that makes gluing each of these sections a slow process. 

This is as far as I was able to get this week. And I think I'm going to have to come up with a better strategy for gluing these as flush as I can with the lower. I have an idea in mind, but you'll have to wait until next time to see if I'm successful.

To be continued...


Tuesday, February 6, 2024

MPC 1:72 Millennium Falcon/ Stellar Envoy (Part 2)

 Kind of hard to believe but this kit is 45 years old, and with the exclusion of the new parts, this kit shows its age. There is a lot of cleanup work to do first before I can move on to building. This is going to be the long haul of cleaning and sanding. During this process, I even managed to slice my finger pretty well on some of the flash. Thankfully it wasn't fatal, and I can get some serious work done.


I began by removing these huge stubs that connected to the hull section. These stubs were pretty big, so I didn't want to use my nippers, fearing that they might do more damage than I wanted. So I took my hobby knife and carefully scored around the edge of the Stellar Envoy. I also made a few passes to the underside so that the plastic didn't tear off the model. 


I made a few passes cutting the plastic and quickly the stub was removed. This was a very simple process that I repeated on the rest of the model, and all I now needed to do was sand down the edges.


Using my Vallejo Sanding Pads, I slowly sanded around the sharp edges of the kit. This took me a while to do, as I had to sand the top and bottom sections, and some of the areas were difficult to get at. I knew that cleaning these parts was going to be a long chore, but I also knew that once I had this stage completed I was going to have a lot more fun building. 


Some of the flash was difficult to remove with the sanding pads, so I took my hobby knife and carefully cut it away from the edges. This stuff made a mess of my desk really fast, so I kept my small vacuum cleaner nearby to try and keep things tidy. 

Flash is excess plastic from the molds. When the 2 halves of the model mold are put together and the hot plastic is ejected into these molds, sometimes due to excessive use the molds wear down and plastic gets into the seams. Again, with the age of this kit, I was expecting this. 


I wanted to use that cool decal for the cockpit bulkhead. Instead of sanding down the detail (at this point I needed a break from sanding) I flipped the part over and filled the hole in with Tamiya Putty. 

I then painted this with Mr. Hobby Aqueous 12 Flat Black. I've had some issues with Tamiya XF-1 Flat Black recently. It seems that they changed the paint and it's thinner and more delicate than it used to be. So I tried out the Aqueous Flat Black, and I found it to be superior to Tamiya and when I sprayed it on it felt the way Tamiya used to be. 


I painted the floor of the cockpit with Tamiya XF-53 Neutral Grey, and when I test fit the part with the cockpit window I noticed that the chairs would be further in the back making it difficult to see the figures. I marked out some tape where I planned to remove the plastic. 


Following along the edge of the tape, I used my Tamiya Scriber tool to score the plastic until it was thin enough to break off from the cockpit platform.  


I also had to sand the edges to have a more narrow profile, but this was the end result and it will fit a lot closer to the front, making the model more accurate and allowing the figures to be seen better by the viewer. 


I painted the seats with Tamiya XF-59 Desert Yellow and glued it to the floor. I really like the look of this section and it will greatly improve when I build and add figures to it. One odd thing, is that the forward console was never built for this model, and I find it a bit sad that Round 2 included new figures and parts, but nothing to really detail the cockpit aside from the decal. 


And speaking of the bulkhead decal, this is where I'm really bummed out. Sadly the decal just didn't react well to the Tamiya Mark Fit Super Strong decal solvent. When I applied the decal I noticed that it was thick, so I thought a more aggressive solvent would help... it did not. 

I blame this on myself, I think I was too reliant on the solvents. I managed to get out or shrink most of the wrinkles, and then I gave the part a flat coat of Mr. Hobby Aqueous H-20 Flat Clear. Thankfully this will be in the background and I hope that the figures will cover up most of this. 


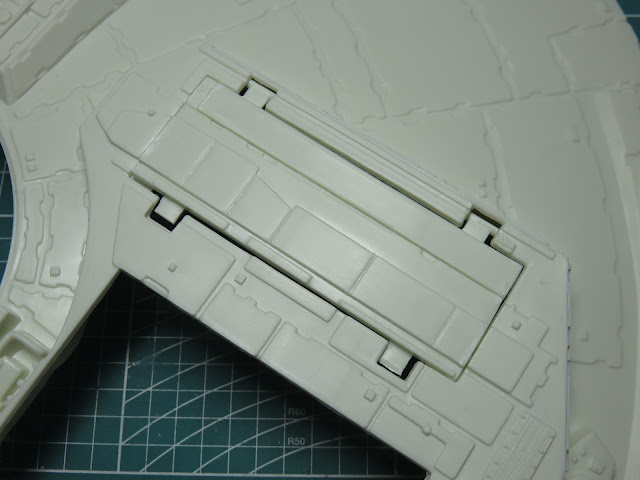
Since I wanted to have the Envoy in flight I glued the doors together using Mr. Cement SP, which bonded quickly with this styrene. 


I then glued the closed doors to the model, but as you can see there are large ghastly holes that need to be filled in. I used various thicknesses of styrene to plug off the bigger holes.


Using 0.20mm Evergreen Styrene, I cut out small panel shapes similar to the ones found around the model. I then glued these panels to the model to hide the preexisting holes. 


And this is the end result. The middle section was the hardest to fill in. This is the battery cover, and there were some major gaps to fill in. But I think that this looks great, and I had a lot of fun cutting out, shaping, and gluing these panels to the underside.

It looks like a bit of a mess at the moment, but I think it will look a lot more impressive once the parts have been primed. The darker grey parts were from my spares box. I can't recall exactly what kit they were from, but I thought that these antenna were a nice looking detail.


Here are the details that I added to the front of the landing gear. Not nearly as extensive as the rear of the ship, but again I had fun creating these pieces.


And that will do it for this week. Next week I'm excited to start working on the turrets, and perhaps I can get some priming done.

The sanding took a lot more of my time than I had expected. However, I was expecting to do some clean up work given the age of this kit. Once you get past that sanding stage this kit becomes a lot of fun!

I haven't built one of these older Star Wars kits in a few years now, and I can honestly state that these kits still are a blast to build, and I can't wait to fill you in on what I've been working on next!

To be continued...