Monday, January 29, 2024

MPC 1:72 Millennium Falcon (2023)


I remember back to Wonderfest 2023 when the first pictures of the MPC Millennium Falcon were first released online. This was a kit that many had been anxiously awaiting. The classic Falcon model, but with new parts for the side walls, and this was a big deal. 

The original side walls of the Falcon were too tall and very inaccurate missing a lot of the key details. There have been many custom kits made on the secondary market to try and accurize this model. However, when Round 2 announced that new parts were on the way fans of this old kit were delighted to get the chance to rebuild a part of their childhood nostalgia, and this time to give the Falcon the proper detail it deserves.


In this posting, I'm going to talk about the new features and examine the rest of the kit. More of the building process will come in the next post, as there is quite a bit to talk about here. 

This kit was first released in 1979 by MPC. and with the mad rush for Star Wars merchandise, there are some shortcomings with these models. However, the Falcon is a pretty sturdy kit, and the details on it are fairly decent, especially for the time when it was created. 

So what scale is this kit? That has always been a mystery, especially since the Falcon's measurements have been inconsistent. We'll never truly know what the scale of the Falcon is, but comparing it to the Bandai model, which most consider to be the most accurate and true version of the Falcon, the MPC kit is basically 1:72nd scale. 

The cockpit and tunnel are too small, and the front mandibles are a bit too long, but for all intents and purposes, I agree with many Falcon modelers that this kit is near 72nd scale.


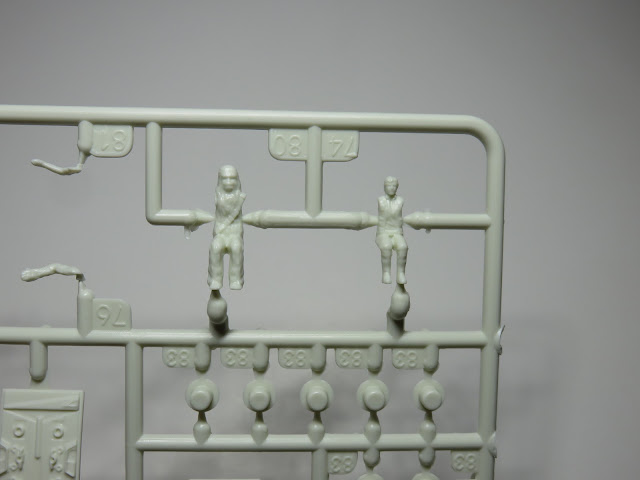
Let's get to the new parts! There are 2 bags when you first open the kit, the bigger of the two contains the older parts. Here we can see that new side wall detail as well as a newly sculpted Han Solo and Chewbacca. What I really admire with Round 2, is that they added in more accurate details, but they somehow still kept it in the same style as the 1979 parts. They look really great!


The new Han and Chewie are some of my favourite parts. The likeness is fantastic, and there are a lot of details to the figures. These are going to look fantastic in the completed model.


Here we have the side details for the forward mandibles. They got the details right, especially by adding those iconic Tamiya engine blocks.  A wash added to these parts is really going to bring out the details. 


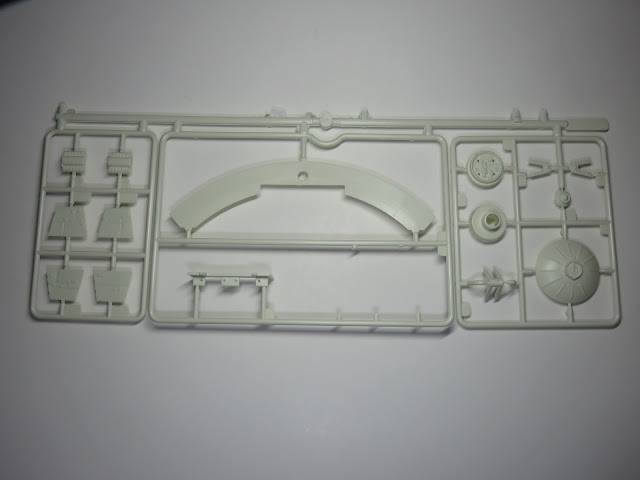
The original 1979 release came with a very simple lighting kit, and Round 2 has added this curved bar that can be installed into the Falcon to add LED's to the back engine. I won't be lighting this model, but it's a really nice feature to have included with the model. 


The dish has also been given an upgrade. It's a bit smaller than the original, and the details are accurate for this version of the Falcon. 


The old clear plastic engines are gone, and we've got these clear blue sections with grill detail. To be honest, this is probably the only upgrade with the kit that I'm not that excited about, and that's probably because I'm not lighting this kit. So I'll have to figure something out with this later on.


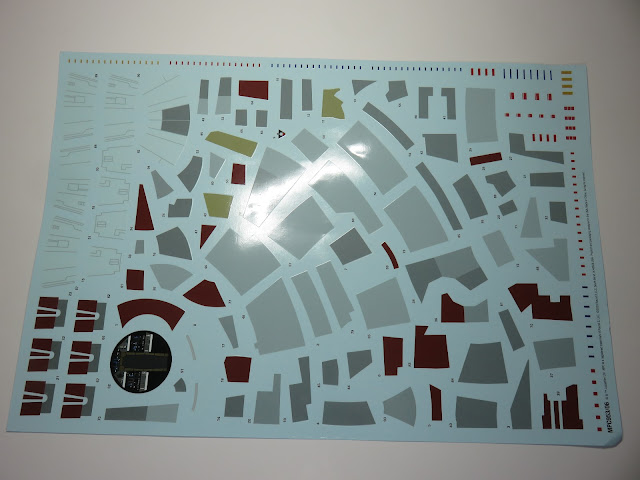
The decal sheet is a welcome addition, as all of these various squares will be a challenge to mask over. And there are a lot of stencils to lose your mind over! 


I really like this decal for the bulkhead of the cockpit section. This will look really great when you see it through the window on the completed model. 


Round 2 has been adding painting and decal diagrams to the outside of the box edges, but this time they included this fantastic poster of the Falcon. I just love how they've kept this in the same style as other Star Wars merchandise of the 70s. I'm really tempted to frame this once the model is completed.


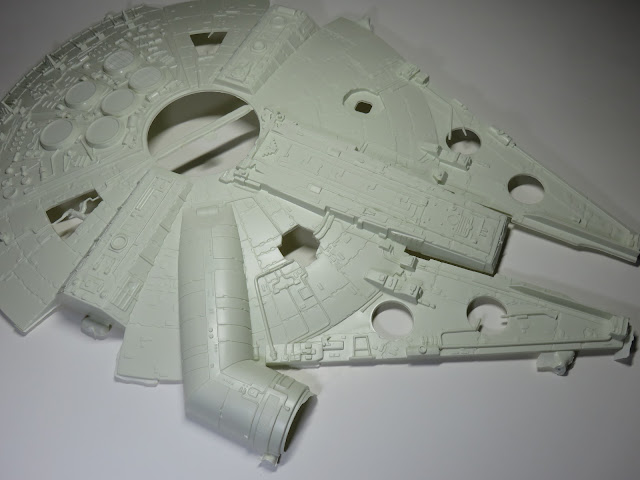
Here is the top section, this section hasn't changed since 1979, but in the next posting we're going to get to work removing those huge stubs and cleaning up the flash. It's going to be a lot of work, but once it's done the rest of the build should be smooth sailing. 


Stellar Envoy


Since I have several Millennium Falcon kits still in my stash I was thinking if there was anything I could do differently with this kit. I remembered that the Falcon has had cameos in Attack of the Clones, and Revenge of the Sith, as pictured above ( it was also snuck into Star Trek First Contact by Industrial Light and Magic at the Battle Sector 001). But this isn't exactly Han Solo's Millennium Falcon, this is the Stellar Envoy.

Stellar Envoy was built 90 years before the Battle of Yavin and was a cargo tug for most of that time. Shortly after the Clone Wars, it was involved in a collision and left for parts when Lando Calrissian got a hold of the ship fixed it up, and renamed it the Millennium Falcon. 

The Stellar Envoy was painted with blue sections and though I can't confirm this, I do wonder if this is why Lando's version of the Falcon in the 2018 Solo film had blue highlights to the hull. 

Stellar Envoy was even made into an official diecast toy in the late 2000's by Hasbro. 

This is going to be a fun project. In the next post, we'll get to work cleaning the parts, and even get some painting done to the cockpit. I'm really excited to build this up as Stellar Envoy, it's going to be a beautiful looking kit when it's all done. Plus I'll get to mess around with some weathering, and I always love doing that with sci-fi kits. 

To be continued...

Tuesday, January 16, 2024

Tamiya Lacquer & Acrylic Paint Retarder


You might have come across these products while you are browsing online or you are in the hobby store. You might wonder what these are for, or you might already know, and you might think that you don't need them, but let me demonstrate how well these products work and I think you will be adding these to your shopping cart.
So what is Retarder and how does it help my painting? Well, it's actually pretty simple, the retarder is added to paints and this slows down the paints drying time. This will help the paint to level down to the surface slower allowing a more flat and beautiful finish. And in the case of hand brushing it can eliminate brush marks. 


First, let's focus on the Tamiya Lacquer Paint Retarder. Tamiya has had Lacquer paints for a while now in the AS and TS Spray Cans. A few years ago Tamiya introduced the LP range in the smaller jars just like their Acrylic paints. With this, they also brought out this new retarder. 

Lacquer based paints dry very quickly, but they are preferred by many modelers because this allows them to work on a project faster. They are also a very hard paint compared to enamels and acrylics and will really bite into the plastic. Lacquers are especially used with car and motorcycle modelers as they can be polished out to a realistic glossy finish. 


This retarder is designed to be mixed with Tamiya Lacquer Thinner, at a 10-1 ratio (10 Parts Paint - 1 Part Retarder). From my own experience, I mix the paint and lacquer thinner together, and then I estimate how much of the retarder to add. I was never totally exact with this mixture, but if I filled the paint cup in my airbrush I knew to add 4 drops. 

Here at my airbrushing station, I've got a bottle of Tamiya LP-35 Insignia White. I'm going to mix it (50-50) with some Lacquer Thinner.


Now that the paint has properly been mixed with the thinner, I've added 2 drops of the retarder to the paint.


I've found the easiest way to mix these together is to put my finger at the front of the airbrush and very gently push some air out. Plugging up the front of the airbrush will cause the air to go backward, in what is generally known as "blowback". Doing this for a few seconds (and that will depend on how much paint you are using) will usually mix everything together and will be ready for painting.


If you have properly thinned the lacquer paint it should feel as if you are using acrylics. The paint will be a lot softer and easier to lay down. As you can see here, the paint had beautifully leveled into all of the complicated surface details and is ready for further painting.

For times when I wanted to paint a mottled or splotchy finish I would usually add a few more drops of retarder because I was going to be painting tiny details and I wanted the paint to flow smoother. 


Here is a painting sample I did to show the differences between adding and not adding retarder to paint. I've used Mr. Color, Mr. Finishing Surfacer 1500 Black. When mixed properly this is an incredibly smooth primer and it has a beautiful sheen.

In this sample I didn't add any retarder, just thinned it with some lacquer thinner. You can see that the texture of the paint is a bit coarse, and this would need to be sanded down and polished. 

Also, look at the overspray at the top, the specks are very thick and it almost looks like stubble. 


And here is a sample with the retarder added. Because this had a slower drying time the paint was allowed to level out more and is now very smooth. Also again look at the overspray, and notice that it's a lot finer and not as thick and dark as the previous sample.


Now that the model has been painted I'm going to use the Acrylic Retarder to paint on some of the smaller panel details. As before with the lacquer retarder the mix ratio is 10-1 (10 Paint - 1 Retarder)


Typically when I'm hand painting I lay down a piece of tape as a pallet. I prefer to work in smaller batches, this makes it easier to thin down. Here I've added 2 drops of Tamiya XF-19 Sky Grey. I then took a clean brush and dipped it into the Acrylic Retarder. I'm not going to need a lot for this small batch.


With the brush, I mix it all together. As you can see the retarder is already working and the paint is thinner and ready to be used.  The paint at this stage feels like properly thinned Vallejo Acrylics, it's a lot easier to use now.


It will depend on the paint you are using, but I've found that I will need to apply 2-3 layers to build up a solid color. This is similar to when I am airbrushing. With the retarder added most of the brush strokes have been leveled out, and the finish is as smooth as the airbrushed parts.


All of the different colored sections were hand painted using the Acrylic Retarder. Now, I'm not the best at hand brushing, but now that I've got some of this Retarder I can practice more. This is going to make things a lot easier for me in the future when I can't mask and airbrush some tiny or difficult parts. 

I've had many modelers over the years ask me how to brush paint Tamiya Acrylics, and I know what they mean, Tamiya Acrylics dry out pretty fast and leave brush strokes. but adding some retarder to the paint really makes a difference, you are going to have to try these out and see the results for yourself.


I'd also like to mention Tamiya Lacquer Thinner with Retarder (the orange cap) This has both of the products mixed together so you don't need to add Lacquer Retarder. This product saves a lot of time trying to get the mixture right. And as a bonus, this will work when you are airbrushing Tamiya Acrylics.

That being said, when you are hand brushing Tamiya acrylics, I'd stick with the Acrylic Retarder. It's formulated for those types of paints and is not aggressive as this Lacquer Thinner can be. 


The Lacquer Retarder is also compatible with Mr. Color and AK Interactive lacquer paints. 


And the Acrylic Retarder works well with Mr. Hobby Aqueous paints. 

Tuesday, January 2, 2024

Tamiya 1:48 F4U-1D Corsair with Moto-Tug Part 9

 Well, here is my first posting for 2024. It's hard to believe that this kit is nearly completed. There's not too much left to build, the majority of work now is building the small pieces and finally assembling the rest of the parts to the aircraft. I'm excited to see this finally finished, so let's get started!


I'm first going to add the identification lights that I drilled out under the wing. To fill these in I used Tamiya Multipurpose Cement Clear and added a drop of Tamiya X-25 Clear Green. I mixed this together thoroughly. If the glue is too thick you can thin it down a bit with some water.


Using a thin pointed brush I was able to pool the glue into the opening. I painted the inside silver so that the clear paints would reflect better. I think I used a bit too much Clear Green as it's pretty dark, so with that color a little goes a long way.


And here is the finished result. I used all Tamiya paints to color the glue, X-26 Clear Orange, X-25 Clear Green, and X-27 Clear Red. Also, there are blue lights on the tops of the wings, for those I used X-23 Clear Blue.


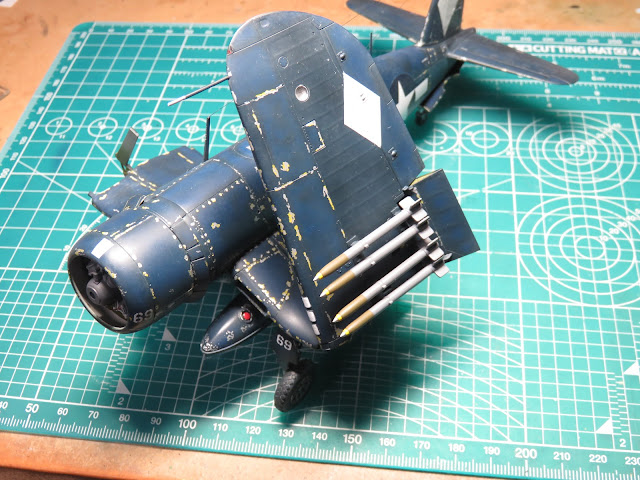
For the HVAR Rockets, I used several different paints, I started by painting the olive drab sections with Mr. Color 304 Olive Drab. After I masked this section I painted the rest with AK Interactive Neutral Grey 43 (RC261).

I tried to mask off the yellow tips, but that was a lesson in futility. So in the end I decided to paint the last details by hand. Yellow is a really difficult color to airbrush and even more difficult to hand brush, so my go to yellow for hand brushing is Formula P3 Cygnus Yellow. It's very easy to hand brush and it's a lovely bright tone.

Lastly for the tips I used Mr. Color 8 Silver, and with that these rockets were now ready to be glued to the pylons on the wings. 


There is an extension on the antenna that connects to the rudder. I couldn't find out exactly what this was, but I decided to replicate it using some 0.05mm wire and wrapping 0.02mm copper wire around it creating a small spring in the same way I did on the landing gears. After it was glued I painted it with Tamiya XF-56 Metallic Grey.


For the antenna line, I used elastic thread from Ushi van der Rosten. This was attached using Mr. Hobby, Mr. Just super glue. This stuff takes a bit of practice to get the hang of as it's very thin and in the winter it reacts to static. But once it's on it adds a really cool level of detail. And since it's elastic I don't have to worry about bumping it off.


The landing flaps were a bit tricky to add. I started with the smaller outer flap and once I had its position figured out I was able to use that as a guide for the larger inner flap. These parts don't exactly fit in place so you're going to have to carefully figure out how to glue these in place.


I then added the HVAR rockets to the wings. These are placed on at an odd angle, so pay attention to the instructions at this stage. 


I added on the drop tanks, and I'm really happy that I went through that extra effort to drill out and build those red fuel caps. They look a lot nicer than before.


Now was finally the time to add on the wings. These fit onto the braces with quite a bit of wiggle room, which is great because the angle they rest at is kind of weird. The instructions weren't too helpful in getting the correct angle, but luckily there is a profile picture on the side of the box I was able to use as a reference.

The wings will flop around a bit so it's really important to add the braces that connect from the fuselage to the wing ( Parts B1) once these were glued this section was a lot stronger and I was able to move the model around without the thought that I might break off a wing from the hinge.


I painted the pilot with various acrylics from Formula P3, The Army Painter, and Citadel washes. I'm by no means a figure painter, but I'm really pleased with how this pilot looks and I'm excited to add him to the cockpit.


With the pilot comfortably seated, I glued the back section of the canopy to the fuselage. I think that there are some inaccuracies here as the canopy should be forward more, but then this gets in the way of the pilot. Sadly the white ceramic I painted that holds the antenna line is covered up, but everything is in place, and it's so fun to see these parts added.


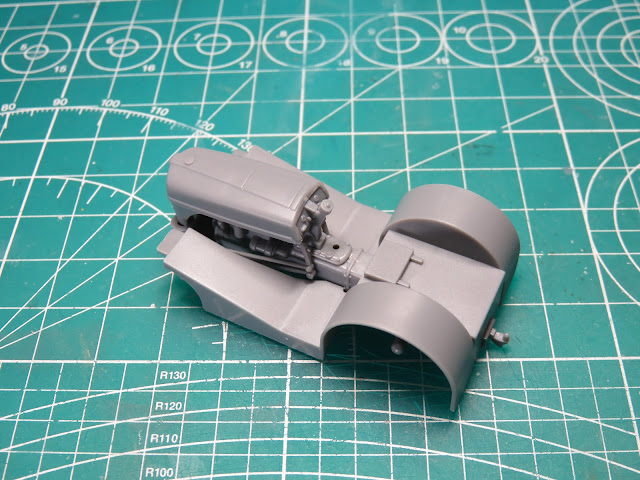
And now it's time to build the Moto-Tug. This little tractor is so much fun to build and for me was worth the price of the kit. There's not much to this build, and I began by gluing the engine halves together and placing that onto the lower chassis section. 


Next, I added the deck for the wheel hubs and the cover for the engine.


I then added the front grill and sanded the joint smooth. I also added some smaller details like the steering wheel and shift lever. 


The tug was then painted with Tamiya XF-66 Light Grey. I looked around and found that there were many different ways to paint these tugs, so I decided to paint it all light grey. After that, I painted on a gloss coat of Mr. Color 46 Clear for the decal application and panel wash. 


I added decals to the back of the fenders, and then I was able to glue the driver to the tug.  The kit also included 2 types of towing bars, one for pulling from the tail wheel, or one that splits connecting to the forward landing gear. 

This is a really fun side project that was sadly only ever included with 2 kits. One was this Corsair and the other was the US Navy Pilots set that at the moment is out of production. It's a shame as I'd like to get that set and build another one of these tugs, but in an alternate scheme. Still this will look great next to the Corsair.


And with that, this kit is finally done!  This was a really great kit to end the year building. Even with its age I still had a blast building this model, especially adding in all of the scratch built details. I have one more of these in the stash, and I think that one I'll build clean, I'd actually like to build one more after that, the 1A version to complete the Tamiya Corsair family.

There are a few shortcomings with this kit, fit issues, and details that aren't really accurate. It would be a great surprise if in the future Tamiya built an all new Corsair similar to their new tooled A6M Zero, and Spitfire Mk I. However I imagine the new Tamiya 1:32 Corsair kits have solved a lot of these issues. 

When I built my first Tamiya Corsair the F4U-2 I was really interested to see how the folded wings worked. And I was really pleased with how fairly simple that process was. The new pilot is a great little addition to the model, as well as those menacing HVAR rockets, and I really love that Moto-Tug.

There are quite a few new Corsairs on the market these days and even a new one released this past month, but I still think that this model kit holds up after all of these years, so I'd encourage you to try one out and I hope that you have just as much fun as I did!

Until next time.