Tuesday, December 26, 2023

Tamiya 1:48 F4U-1D Corsair with Moto-Tug Part 8

 When I started this project I thought that it was going to be a really quick build, paint it all blue, have the wings folded up, and add that cool little tractor. The last thing I wanted was another long project, but that's exactly what I've got myself into. The only difference between this project and my last one is that I'm still having a lot of fun with this kit. And this week I'm going to try something new that I tried once before when I built the Tamiya 1:48 F-14D. I played around with oil paints, but I never really got the results I wanted for a dirty and used surface. 

This time I'm going to try the effect again, and I think I'll be a lot happier with the end result. 


I started by painting the landing gear and wheel hubs with Tamiya LP-72 Mica Silver. I then painted the springs and brake line with XF-1 Flat Black.


Next, I painted Tamiya Panel Line Accent Color -Black- to highlight the details on the silver parts. This will really help all of those details stand out that are usually reflected by the silver paint.


I painted the tires using Vallejo Black-Grey (70.862). I really like to use this color for tires as it's not as jarring as using something like Flat Black. The Black Grey has a more used look and compliments the rest of the model.

To add some more weathering to the model I brushed Tamiya Panel Line Accent Color -Grey- onto the tire and I had a lot of fun watching it pool around all of the treading that I had created earlier. Now it really looks the part. Once the wash had dried I cleaned off the excess with Tamiya Enamel Thinner.


Here is the completed landing gear ready to be glued to the wheel bay. I gave the entire part a flat coat, and I'm really thrilled with how the tire treads look with that wash. Also, those springs that caused me a lot of grief at times really add a nice level of detail I've been trying to achieve with this model.


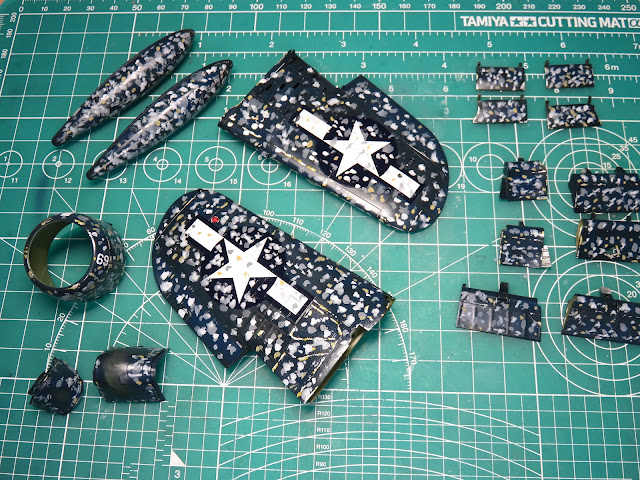
Aside from the fact that my Corsair looks as if I angered every bird in the Pacific, there was a method behind my madness. 

I used the following Tamiya Enamel paints: XF-2 Flat White, XF-19 Sky Grey, XF-60 Dark Yellow, and XF-66 Light Grey. I thinned each of these paints with Tamiya Enamel Thinner so that the paint wouldn't be too thick for the next step.

I've tried using the dot filter method in the past and I've had limited results with it. I've found that Tamiya Enamels are really easy for me to control and generally get the look that I had in mind. It's important to let the enamels dry thoroughly for this to work properly. Adding enamel thinner does help speed up the drying time a bit. 


I dotted every part that wasn't going to be interior green. At the moment it all looks like a hopeless mess, but soon it will all come together.

I should also mention that this is done over a gloss coat. You can do this on a flat coat but it's a little trickier, as the paint bites into the flat coat more and makes it a lot more challenging to remove and distort the paint. 


I hunted for the right brush for this process at an art supplies store, but I couldn't find anything that was just the right shape. Later on, I happened to be walking near a cosmetics department and I saw these blush brushes, and it looked close to what I had imagined. This particular brush will lose the odd hair, but it works incredibly well for this process. 

First I'll wet the paint down, by gently brushing on some enamel thinner. You really don't need to apply a lot here, just enough so that the paint will be reactivated. Next, I take the brush and stipple the surface of the paint creating a nice muddy pattern.

As I go along I dab the brush into a paper towel to remove the excess paint.


Here you can see much closer how all of the colors will blend together and create a uniform layer of grime from all of the flying this Corsair has done. You can still also see all of the colors in the different shades of blue that were previously painted. 


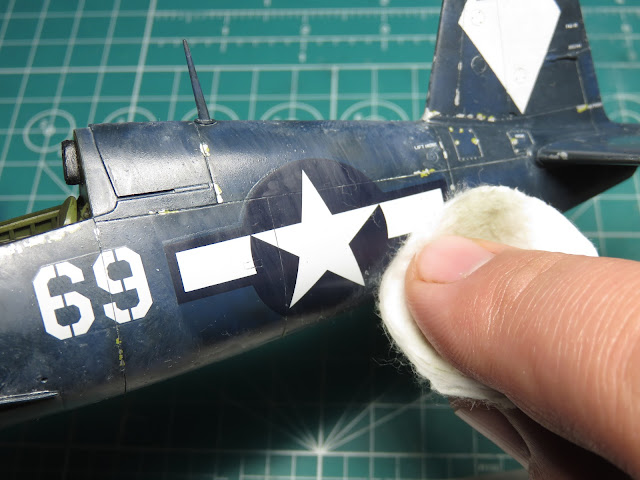
There were a few places where there was just too much paint and I wanted to remove some of the excess. I use these cotton pads which are really inexpensive and they last quite a while. After I've removed the paint I'll use the brush to once again dab the surface just as before.


And this is the end result. It's a bit hard to make it all out because of the gloss coating reflecting the colors. You might notice that there are a lot of hairs from the cotton pads that I used. These are stuck into the wet paint and are difficult to remove. However, I've found that once the paint is completely dry they are easy to remove simply by brushing over the model using a thick brush.


For a flat coat, I used Mr. Color Aqueous Flat Clear (H-20). The flat was thinned about 40% with Mr. Levelling Thinner and lightly sprayed onto the model to seal everything together. I then left the model to dry for about 24 hours to allow the flat to harden up properly for me to handle for the final assembly.


On all of the Zinc Chromate Green sections I painted on Tamiya Panel Line Accent Color -Dark Brown-. I was really excited to add it to the cowl flaps that I built earlier as the wash really showed off the springs and other details that I built. This is going to look really cool in a moment when it's finally added to the model.


I've now glued the cowling around the engine. I really like the effect that the chipped paint has with the XF-4 Yellow Green and now that the flat coat is added the AS-12 Bare Metal Silver is toned down and really compliments the rest of the colors.

It is unfortunate that once the propeller is added a lot of that engine detail will be hidden, but for the moment I'm enjoying looking at all of the different details. 


I also added the Dark Brown wash into the gear bays, and it really helped all of the wires pop and stand out. I've also glued on the pylons that will hold onto the drop tanks. I'll be adding these to the model after the landing flaps are put in place.


I used Mr. Hobby, Mr. Just super glue to attach the landing gear to the bays. Tamiya designed these parts to fit in place really securely so the installation was easy. I can't really say the same for the gear doors. I had a harder time getting these to fit, so again I used Mr. Just and this made the installation a lot easier.


I wasn't too thrilled with the gunsight screen that came with the Tamiya kit. It's sort of accurate in its own way, but I thought I'd try making a new one from some clear plastic. I cut some thin strips of styrene that would act as the bracers. I painted these with XF-1 Flat Black and then glued them to the inside of the canopy frame using Tamiya Multipurpose Cement Clear.

Once the frames were dry I then glued the clear sheet. This however was a new challenge, as I added the gunsight to the instrument panel the gunsight was too big and the new screen I built was also too big. So I had to start over and shorten this section as well as lower the gunsight quite a bit to make it more accurate. 

Eventually, I managed to get everything to fit in place and I was able to glue the forward canopy to the fuselage.


With the forward section of the canopy added I could build the pilot that came with the Moto-Tug section of the kit. The pilot figure was pretty easy to build up and I really like the pose. The right arm will rest slightly hanging over the side of the cockpit, while the left arm will rest on the canopy. This arm was a bit more difficult to get the pose correct, but with some patience, I eventually got it in the right position.


Now this is exciting, I can firmly state that I'm nearly done with this model. There's not much left to do now except paint a few smaller parts and then I can add on the landing flaps and the wings. 

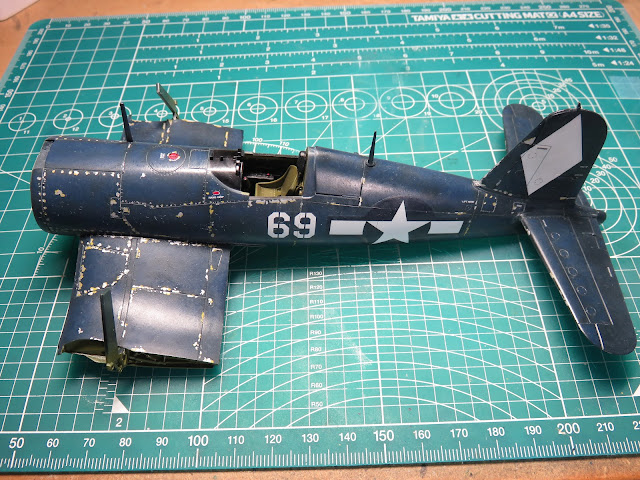
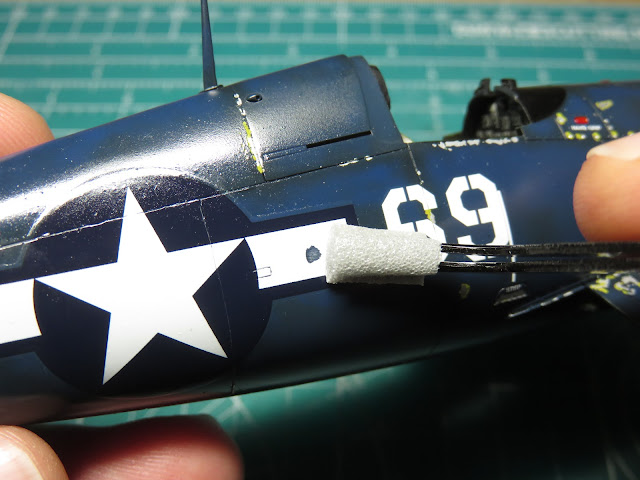
It's been a fun week to see all of these parts coming together, and I'm a lot happier with my painting choices now that the flat coat has blended all of the colors together. Also, that oil filter really added just the right amount of grime and use I had wanted. 

Now I just have to be careful, as when I get this close to having the model completed I get over anxious and rush, and that just leads to creating mistakes. Until next time!

To be concluded...

Tuesday, December 19, 2023

Tamiya 1:48 F4U-1D Corsair with Moto-Tug Part 7

 Now I'm at one of my favorite stages in the modeling build, applying the decals. I've loved this stage ever since I was a kid as it feels as though this is really where the model comes together. I know that many modelers don't like using decals, so in this entry, I'm going to be going through as thoroughly as I can to explain the process and hopefully relieve any trepidation you might have.

First I looked at the diamonds that would go on the tail and wings. And because of their large shape, I was hesitant to use the decals. I thought that they might be too difficult to conform in the areas they needed to go on, so I decided to mask these off and paint them on myself.

I scanned the decal sheet and imported the image into Photoshop. I was then able to trace out the four diamonds and color them in black. This would make it easier for me to see them when I cut them out for the model.


I doubled some tape and placed it on the back of the diamond. When I was satisfied with the placement I then taped around the diamond with modeling tape, being sure to press firmly around so that no paint would bleed through. I added extra tape than what I've shown here, as I wanted to avoid any over-spray that could happen.


I painted the diamonds with Tamiya XF-2 Flat White. I thinned the paint about 50-50 and lightly layered the white on to try and avoid any buildup. It took a bit longer to paint these sections, but it was worth it in the end as it looked a lot nicer than trying to get the decals to conform to the bumpy surface.


I was just about to add the decals when I realized I forgot to paint the fuel cap and the emergency release handles around the cockpit. I painted these with Mr. Color 3 Red. You can see from the over-spray on the tape this paint didn't flow the smoothest. Next time I use it I'll have to remember to add some Mr. Replenishing Agent to the Red before I paint.


I used my Tamiya Decal Scissors to carefully cut around the decal and trim away as much of the carrier film as I could. The Tamiya decal scissors are a really fantastic investment as they make trimming around the decals very easy. Carrier film is placed over the ink and it keeps the decal together and also prevents the ink from running when it's in the water. However there are times when the carrier film doesn't stick to the surface of the model and the air gets trapped inside creating an air bubble, this is called silvering. 

By removing some of the extra decal film, I hope to avoid any silvering that could occur. 


I placed the decals into water, soaking them for about 10 seconds and then leaving them on the cutting mat to soak until the decal was ready to be removed from the backing.  When they were ready I slid a part of the decal off the backing and moved it into place. There was enough water on the decal so it was easy to slide it around. 


When I had the decal in place I took a cotton swab and I slowly and carefully rolled the swab along the decal to remove the water that was still behind the decal. Once I had removed the water I kept rolling the cotton swab along and I gently pressed the decal to the surface of the model. This was done to remove any air bubbles that might still be hidden and would help prevent any silvering from occurring. 


This next step is optional to some modelers, but adding a decal solvent will help melt down the decal and ensure that it sticks more snug to the surface of the model. 

There are many decal solvents on the market today, and because of the large variety, there are also a lot of opinions on the internet as to which decal solvent is the best.

I've tested and tried several over the years, and I prefer to use Tamiya Mark Fit -Super Strong-. This is the newest decal solvent from Tamiya, and it's pretty aggressive so be careful. I really like it as it works really well on Tamiya and other brand decals. 

I used my dedicated decal brush and I carefully, (and quickly as this stuff starts to work fast), brushed the solvent around the edge of the decal and then over the rest of the surface.  Once it's brushed on it's time to set the model aside and let the solvent do its thing.


Depending on the decal, you might see it start to wrinkle. Don't panic! This is normal when using decal solvents. Right now the decal is softened and melting, and soon it will dry out and lay down flat just as before.


The solvents will help the decal conform to the surface, but now that the decals are softened up a bit I took my hobby knife and I carefully scored into the recessed panel lines. I would then apply a second coat of solvent over the decals, and the decals would gently fall into the panel lines. This step is of course completely optional, as it can be tricky to cut into those thin groves.


Do you remember when I said you needed to be careful with the decals after you apply the decal solvents? Well, I was a bit clumsy when I applied my second coat and the brush dug into and damaged the decal. 

Now I could simply leave this area and paint it silver with some yellow-green to look like chipped paint, but I'm going to show you how I repainted this area white.


I first sprayed over the decals sealing them in with Mr. Hobby Aqueous 30 Clear. We're going to be sealing in the decals so that we don't further damage them. Once the gloss had dried I took some Tamiya Sanding Sponge, 600 and 1000 grits, and I carefully sanded around the damaged decal. The 1000 grit was then used to polish and smooth out the area.

This sanding process is going to look pretty bad and you might panic, but work slowly and carefully, and keep in mind that I've only sanded in the white area. Smooth out the damaged area as best you can, as once the paint is applied with could become pretty noticeable.


I then cut some tape and tapped it onto my jeans a few times to remove some of the tack. These need to stick, but I don't want them stuck on so strong that they might remove the decal. Even with the gloss coat to seal in the decal, this can still happen.


I carefully sprayed Mr. Color 62 Flat White as this white was close to the same tone as the decal, however it will always be a bit off in tone.  I started by spraying a few light layers into the center section. I left the paint alone to dry for a few minutes, and then I added a second layer. 

I did this process a few times, just spraying on light thin layers as I really wanted to avoid any paint building up around the edges. 


This was not what I was hoping for when I started adding the decals, but it's all painted, and now it's time to remove this tape and hope for the best.

I slowly removed the tape from the edges, don't pull the tape straight up or you will run the risk of damaging the decals, and I don't want any more damage to paint over.


WHEW! Now that's not too bad. You can see at the bottom of the bar there is a bit of silvering from the decal lifting when I removed the tape, but it all came off easily, and it looks pretty good.

It's a bit brighter than the decal ink, but I think in the next stage of weathering this will blend in a bit more with the model. 

I added a bit of decal solvent to the area that lifted, and now I'm going to gloss the rest of the model and parts with the Mr. Hobby Aqueous Gloss.

From certain angles and in certain light you can see the damaged area, but I'm really relieved that this turned out so well.


I wanted to show one more difficult decal. This is on the lower wing and I noticed that there was a hole in the decal and it was meant to fit around one of the pylons. I placed the decal down over the pylon, and then as I demonstrated before I pressed the decal and got all of the water out. I then added some Tamiya Mark Fit -Super Strong- and when the decal began to melt I took my knife and cut off the decal separating it from the pylon platform so that the rest would lay flat on the wing.

To fill in the cut area, I carefully painted Tamiya X-2 Gloss White, and X-3 Royal Blue as this best matched the blue on the decal. As you can see this all blends together really well and it almost looks seamless as if the decal was never cut.

When you do this try and use gloss paints, as they blend together better with the semi-gloss finish of the decals.


I think that this has been enough excitement with the decals. Next, I'll be weathering up the model a bit, just enough to break in the nice blue paint and get some dirt into those scratched-up silver areas.

I'm pretty close to getting this model completed and I'm really relieved that the decal was able to be saved.


I forgot to mention from the previous post that I was able to fix the damaged areas of the Corsair from when it fell. Thankfully the repairs weren't too bad. The arm that holds up the wing on the right side was completely broken off, so I might need to bend it with heat to get it in just the right position. 

But there's still a bit more to do first, and I've got to build that fun-looking Moto-Tug!

To be continued...


Tuesday, December 12, 2023

Tamiya 1:48 F4U-1D Corsair with Moto-Tug Part 6

 Now that all of the Masking Sol NEO has been applied I can get to painting the blue, and I'm really excited to start painting. I'm going to be using an overall Navy Blue, and that can be a bit boring to have a completely uniform colored model. So I'm going to be painting some other blues in an attempt to create a sort of marbled blue color, which will look a lot more interesting with the chipped paint.

I started by painting a base coat of Tamiya XF-17 Sea Blue. This is a really nice color with a bit of a green tint to it. It's very dark and almost looks black without direct light on it. 


For the next color I wanted something lighter, and I used Tamiya XF-8 Flat Blue. I painted this in between all of the pane sections, and I did my best to keep the paint splotchy and uneven. This will give the effect of random fading in the paint from the harsh climate of the Pacific. 

It looks a bit extreme right now as that Flat Blue looks really bright against the Sea Blue, but I can assure you in the next step it will all come together and be really impressive.


I decanted Tamiya AS-8 Navy Blue into a spare paint jar for airbrushing. After I loaded the paint into my airbrush I thinned it down about 70% so that it was quite thin and easy to spray. This stage of the painting takes some resistance, as it's really easy to overdo it and ruin the base work we've just painted.

I sprayed the paint on in light layers, making even passes back and forth on the model. I sprayed these light coats until I had the color I desired. You can see how nicely the Navy Blue blends the other colors together and still leaves that nice marbled effect of the previous paints.

Another thing to keep in mind with this method is that because the paint is thinned down more it will lay on more glossy/wet, and you will want to add a lot more paint to the model. But you must remember that the paint is going to dry darker, so put the parts aside for a bit and wait for the paint to dry to really see the result. And then you can decide if it's enough, or if you want to add more paint.


The fun doesn't end with the painting! No, it's actually just getting started, as it's now time to remove the Mr. Masking Sol NEO from the model.  Masking Sol NEO is pretty easy to remove, especially if you've painted nice thin layers onto the model. I took a cocktail stick, and I'm slowly scraping the Masking Sol NEO. Most of it was easy to remove with the cocktail stick and my finger.


However, for those times when the masking just won't remove itself from the model I've found that using a soft rubber eraser over the Masking Sol NEO makes removal very quick and easy, and it won't damage my paint.


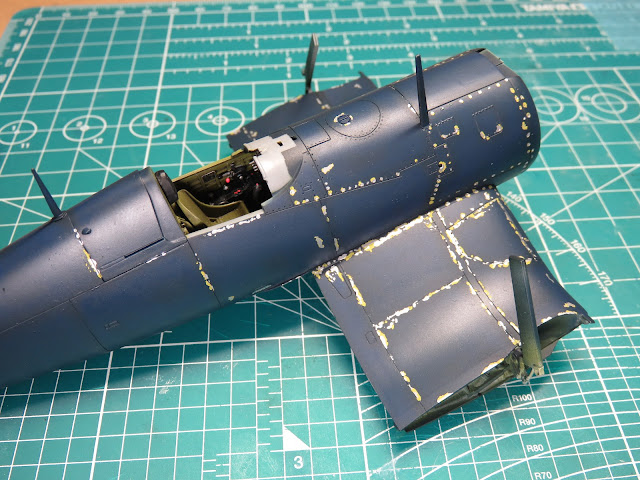
Now we can see how that chipping looks against the Navy Blue. I really love the bits of Tamiya XF-4 Yellow Green mixed with the AS-12 Bare Metal Silver. At the moment the Bare Metal Silver is really bright and overpowers the Yellow Green, but once the model is completed I'll add a Flat or Semi-Gloss coat and this will take some of that bright shine out of the model.


Here is a closer view of the top of the wing. Sadly a lot of this detail will be hidden once the wings are folded up. But you can see the variation in the blue tones, and the Yellow Green surrounding the silver sections. 

In the words of George Lucas "I might have gone too far in a few places" but this was a lot of fun, and would look even better with a larger-scale model. It's nice to see how these chipped sections stand out from the blue, it's even better than I had imagined. 


I nearly forgot a very important part to paint and that's the middle section where the wings separate. It depends on the type of Corsair you are building, sometimes these sections are the same Navy Blue color, but I decided to follow the Tamiya instructions. I took my time here to carefully mask off these sections so that no paint would bleed through.

I again used Mr. Color 351 Zinc Chromate Green, and I very carefully and slowly painted this inner section. I gradually built up the layers of paint, and I was careful not to spray in areas where the paint might pool under the tape, which would be a major setback to try and clean up.


I held my breath as I slowly removed the tape, and I was relieved to see that none of the Mr. Color 351 had bled through.  It's looking really good here, and my next step is to add a gloss coat to all of the parts to get ready for the decals.


I turned my attention to the landing gear and wheel hubs. I first primed these parts with Mr. Surfacer 1500 Black, and once that had dried I sprayed the parts with Tamiya LP-72 MICA Silver. This is another silver paint that I really love as it's duller and doesn't have quite the same radiant luster as other Tamiya Silver paints.


To bring out the details I painted Tamiya Panel Line Accent Color Black. When you are using silver it's important to use a black wash. This is because the black paint will stand out and not be reflected like other colors. 

After the Accent Color dries I'll remove some of the excess wash with Tamiya Enamel thinner and seal the paint in with a gloss coat.

*            *            *            *            *

Unfortunately, this is where the progress will stop for the week. While I was spraying a gloss coat onto the fuselage section the clamp I was using to hold the model twisted off and the Corsair fell crashing to the floor.

Several parts are damaged, worst of all was one of the arms that will hold up the folded wing. So I'm going to go about fixing that, but once it's fixed I'll resume painting a gloss coat and we can finally add some decals.

To be continued...

Tuesday, December 5, 2023

Tamiya 1:48 F4U-1D Corsair with Moto-Tug Part 5

 As I mentioned in previous posts, I had expected the painting to be fairly straightforward with some minimal chipping in a few places. But discovering that picture I changed gears and I'm set to create a more weathered and beat-up Corsair which is going to be a lot of fun.


The first step would be the long process of masking up everything I've just spent all of this time working on, so I planned to be very thorough here. Using a lot of small pieces of tape I was able to carefully mask up and around the cockpit.


Because of the dryer climate out here on the prairies in the winter, the masking tape has the tendency to lose its adhesion and lift. This can happen even after a few hours of the tape being applied. The tape that I'm using is Nichiban, it's a type of Kabuki tape like Tamiya, but a bit thinner and blue. 

To help prevent the tape from lifting any further I brushed on a layer of Mr. Hobby, Mr. Masking Sol NEO. This is a liquid masking agent that I'll go into more detail in just a bit. But it's a wonderful product that provided a nice uniform seal around the tape.


Masking the landing gear bays was a bit more difficult, but eventually, I taped around the edges of the bay, and then I stuffed tissue paper into the front section. I'm pretty satisfied that this masking will hold up with the upcoming painting process. 


I primed the fuselage and various parts with Mr. Surfacer 1200. I inspected the model seams to make sure that there were no gaps that needed filling as well I checked for scratch marks that could have been left behind. 


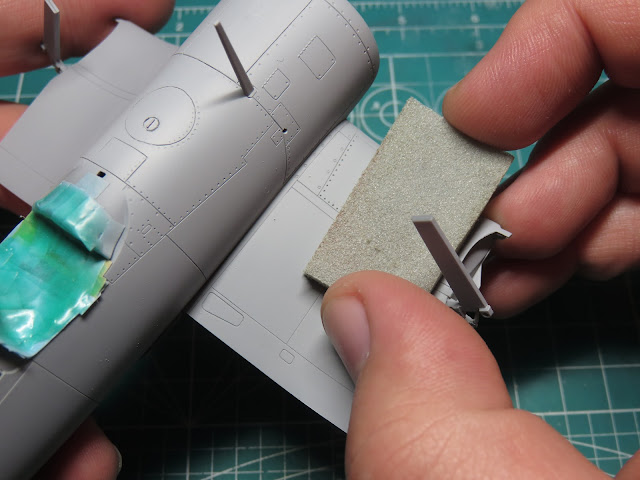
There were some specks of paint that landed in the primer. I used an old piece of Tamiya Sanding Spong 1500 grit. And I lightly sanded down the surface of the primer. This would remove any specks, as well it would smooth out the primer a bit more. 


Here you can see the newly sanded wing next to the still rough fuselage. It has a slight sheen to it compared to the bare primer. Now that it's been smoothed out it will look a lot better for the first layer of paint.


The first layer of paint I used was Tamiya AS-12 Bare Metal Silver. This is the first time I've ever used this paint, and I really regret not using it sooner. It's a really beautiful even finish with a very nice sheen to it. 

I painted AS-12 onto the other sections of the model, like the cowling, wings, and flaps. Every part that wasn't fabric-covered was painted with AS-12. 


For the chipped paint, I applied Mr. Masking Sol NEO, using an Army Painter Insane Detailer brush. I've tried a few masking agents over the years, but a fantastic master modeler Andy Moore from the UK showed me how he used Masking Sol NEO, and it's been one of the best products for my modeling ever since.

Andy explained that compared to other masking agents Masking Sol NEO doesn't dry flat and level so it's a lot easier to remove when you are done painting, as well you can add on a lot of layers of paint and not really worry about covering up the Masking Sol NEO.

I'm applying it with a brush but you can use a toothpick or sponge it on as Andy demonstrates in a lot of his builds.  And the nice thing is that if there were places I wasn't happy with the masking I could quickly remove it and start over.

It works really well with a lot of paint types, and I haven't had any instances of it lifting paint, so let's hope this isn't the first project where that happens.


Here you can see the finished first application of the Masking Sol NEO. I added it to the panel lines and areas where crewmen might be walking along. I also applied quite a bit to the wing root and leading edge of the wing as these areas shown in the photograph have the most distress. 


One of my favourite paints in the Tamiya range is XF-4 Yellow Green, and I just don't get to paint it enough. This paint is a fantastic color for Zinc Chromate Yellow and will look really great chipped next to the silver and stand out on the overall blue finish. 

I have a part of a DC-3 with some Zinc Chromate Yellow on it, and Tamiya XF-4 is very close to the real color.


I applied more Mr. Masking Sol NEO onto the previously painted layers. Again I focused on adding this to the panel lines, as well I painted it around the silver areas. This would create layers of chipped primer and silver and help make the model look more worn. 


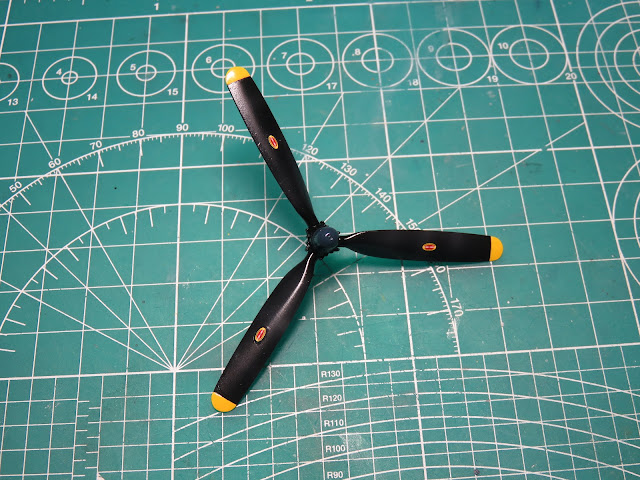
I began painting the tips of the propeller with XF-3 Flat Yellow. The tips were then masked off and I painted the entire propeller XF-1 Flat Black.  I wanted to fade the black paint so I thinned down some XF-55 Deck Tan and lightly painted that to the propeller as you can faintly see in this picture. 

I wasn't as pleased with this result. So I glossed the propeller and added the small stencil decals to each of the propeller blades and sealed them in once more with a gloss coat.


To weather down the propeller I painted Tamiya Panel Line Accent Color Grey, and let it dry overnight. I've found that these washes from Tamiya are easier to manipulate after they've had proper time to dry.


I then took a thick flat brush and dipped it in Tamiya Enamel Thinner, just enough so that the brush was damp.  I then stippled the propeller removing some of the paint and creating a sort of marbled effect that might replicate the exposure to the Pacific weather. 


After the paint had dried again I added a flat coat over the propeller to seal the enamel paint in. I'm sort of annoyed with myself that I wasn't able to get the effect I had imagined with the airbrush, but using the enamel grey paint like this is still a really nice-looking result, and it's a pretty simple effect to add.

In the next post, I'll begin to paint the Navy Blue, and then I'll remove all of the liquid maskings. I'm very excited about that stage, the painting is going to be really fun and I'm excited to see how that chipped paint will turn out.

To be continued...